Import/Export Classification Configurations
At any time when using the Metrix Asset Management System, users can opt to import and/or export their classification configurations. This can be useful if you are working with a provided training or test environment and wish to migrate configurations between the two.
Exporting Classification Configurations
-
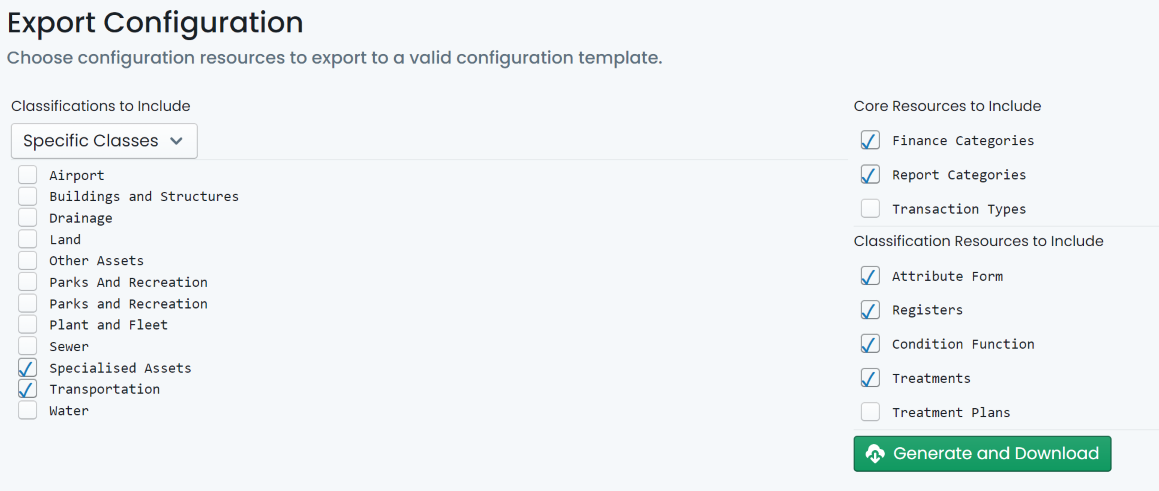
To get started, navigate to the ‘Export Configurations’ page. (Assets Menu > Export Configuration).
-
The export system allows users to export resource definitions at one or more of the following levels:
- Specific Classes: an entire asset class definition. For example: all of the ‘Transportation’ class.
- Specific Classifications: a single asset classification definition. For example: just the ‘Local Road’ asset group.
-
Each of the above level selectors will render a different list of available checkboxes to include in the export. That is, if you choose ‘Specific Classes’, you will be presented with a list of checkboxes representing each asset class configured in your system. If you choose ‘Specific Classification’ each asset group will be rendered with a checkbox.
Simply tick the checkboxes you wish to include in the export.
-
Then, on the right-hand side, simply confirm which resources you want to include in the export by checking/unchecking resource types.
-
When ready, click ‘Generate and Download’.
This will download a
.jsonfile that can be used in the following instructions for ‘Importing Classification Configurations’. Make sure you save the file in a location that you can easily access.
Importing Classification Configurations
-
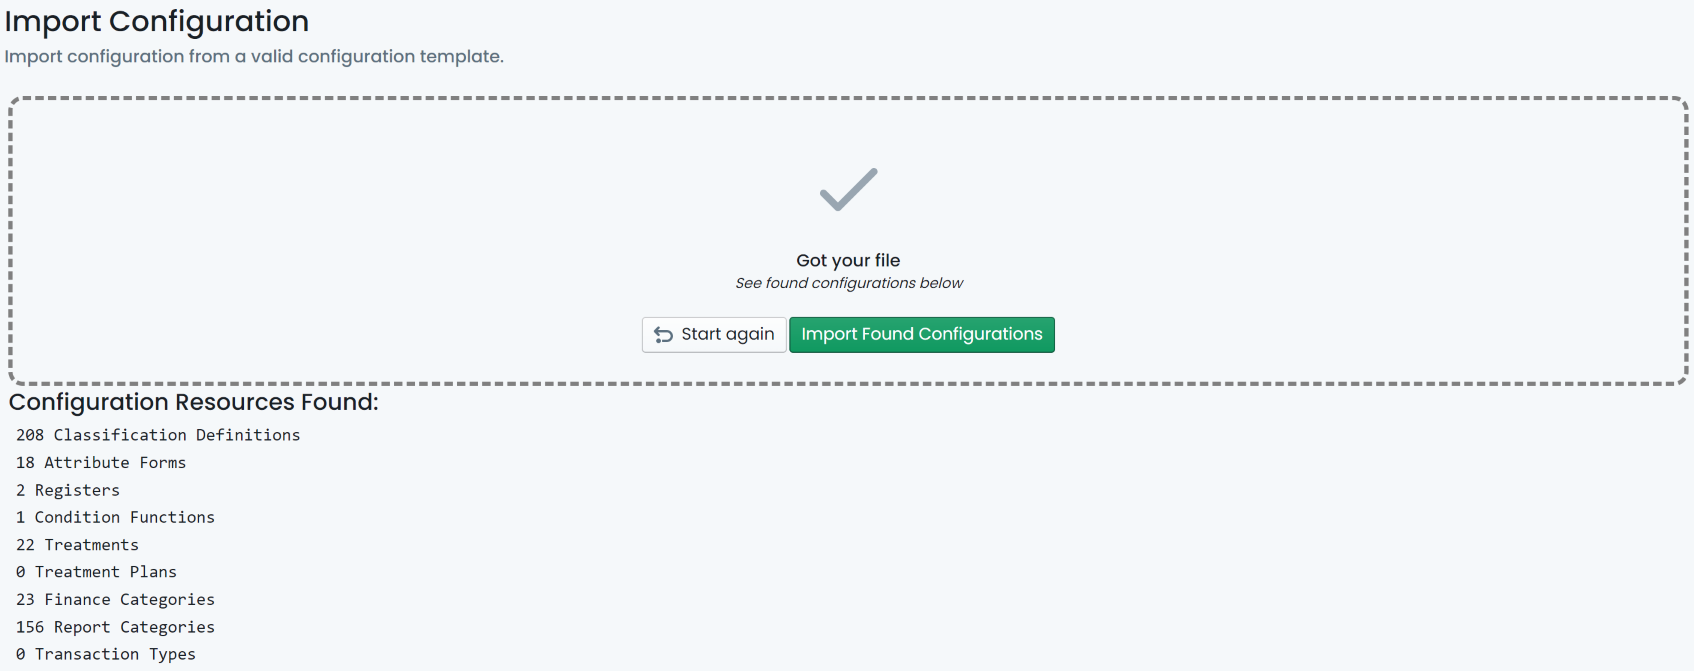
To get started, navigate to the ‘Import Configurations’ page. (Assets Menu > Import Configuration).
-
From this page you can either drag and drop a valid configuration file (see above) in to file dropper, or click ‘Select a File to Upload’ to choose a file from your system.
-
The system will parse the supplied file and validate the classifications and resources included therein. A preview of the found elements will be rendered when ready.
-
To confirm the import, click ‘Import Found Configurations’.
-
The imported configurations are now ready to use.