Save or Discard Changes
Making edits to your asset information in the Metrix Asset Management system is a two-phased process. First, you make the alterations. Then, you save those changes (or discard them). The following outlines how you can do this.
This document provides guidance on saving changes, as well as some other options around saving or discarding your changes, including.
For each of the following sections, we assume you have one or more pending changes to your asset information. If not, make some edits to your asset and/or component information.
It should be noted that users can make many edits in a single sessions before opting to save or discard those changes.
Give it a try.
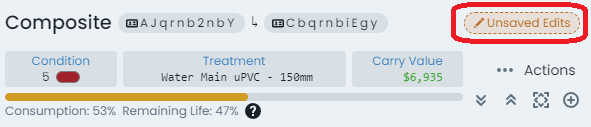
After your first alteration, you will notice that the ‘Save or Discard Edits’ button in the top-right
hand corner of the page is now activated. Additionally, there is an orange marker line surrounding the
info panel for the asset/component that the changes occurred on.

Saving Changes
-
Start by reviewing your change(s), click on the ‘Save or Discard Edits’ button. A dialog will appear with a summary of the changes you have made to your asset and/or component data.
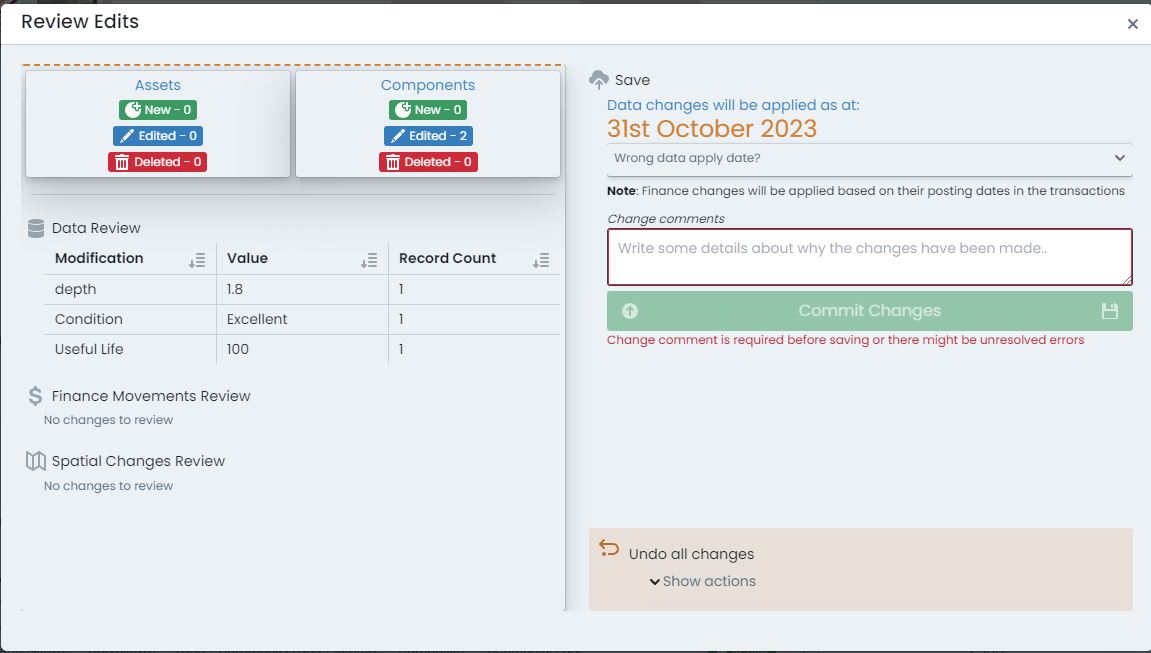 Alterations are broken down by type, and summarised into affected record counts.
 -
To commit the changes, provide a short comment about the alteration, and then click ‘Commit Changes’.
-
The data will then be permanently saved to your Metrix Asset Management system.
Saving Changes at a Specific Date
The Metrix Asset Management system maintains a full audit history of changes users make in the system. This audit history is available through the ‘Report’ generators - allowing a user to backdate certain reports, to get asset/component information as it was at a specific point in time.
To extend upon this capacity, the system also supports backdating the ‘Effective Date’ of an alteration so that it can be visible in specific reporting ranges.
A common use case for this feature is logging updated CONDITION values for components that were renewed during a specific financial period - but only being recorded after said period has passed.
For example, updating condition values during your ‘End of Year’ process in August, to affect information in June.
-
Start by reviewing your change(s) - click on the ‘Save or Discard Edits’ button. A dialog will appear with a summary of the changes you have made to your asset and/or component data.
Alterations are broken down by type, and summarised into affected record counts. -
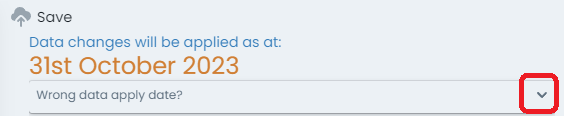
To set a specific ‘Effective Date’ for the alterations summarised, expand the panel below the current date (which is rendered at the top of this dialog).
-
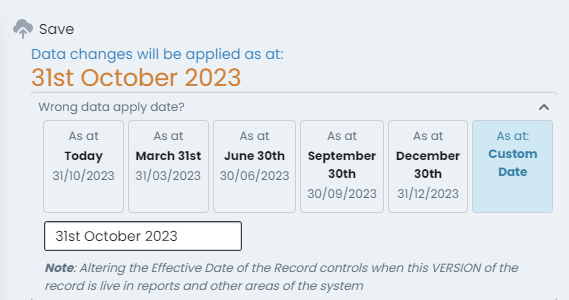
The expanded panel provides options to override the ‘Effective Date’ with shortcut values, or a custom date entry. Make your selection for ‘when’ the change(s) should be applied.
-
The data will then be permanently saved to your Metrix Asset Management system, effective from the date you specify.
Discarding ALL Changes
-
Start by reviewing your change(s), click on the ‘Save or Discard Edits’ button. A dialog will appear with a summary of the changes you have made to your asset and/or component data.
Alterations are broken down by type, and summarised into affected record counts. -
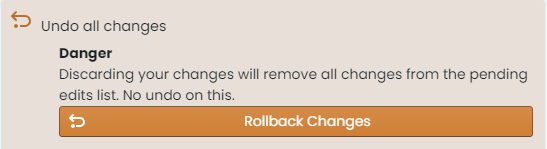
On the bottom left-hand side of the dialog portal, a collapse panel is rendered offering you the option to ‘Undo all Changes’. Click on this panel.
-
The panel will expand, revealing an option to ‘Rollback Changes’. To continue with undoing any alterations you have made since your last save, click this button.
-
Any alterations you have made will be reverted, and your session restored.
Discarding Specific Component Alterations
-
At any time during an editing session, users can review what information has changed on a specific asset or component from right within the info panel. In the top right-hand corner of the info panel is an ‘Edits Indicator’ that appears when the active asset/component has pending edits against it.
-
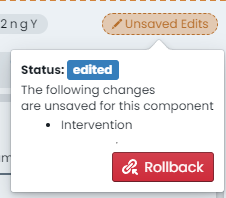
Click on this indicator to see a brief summary of the changes.
-
To rollback all changes recorded against the active component, click on the ‘Rollback’ button inside this preview.
 Note
NoteThis option only relates to COMPONENT data edits. It cannot be used to revert alterations made on the parent asset info panel.