System Configuration

This section covers areas of the Metrix Asset Management System that would be managed by a system administrator and/or an asset class champion. The settings discussed will control how your assets and components behave within the system. The following topics are covered:

  • Asset and component classifications

  • Custom form definitions

  • Task Type Specifications

  • Component intervention treatments

  • Condition functions

  • Reporting categories

  • Status Codes

  • Finance categories & transaction types

  • Configuring asset classifications

The general assumption throughout this section is that you have access to a valid Metrix environment and have been issued with an active user account for that environment WITH ADMINISTRATIVE PRIVILEGES. If one or both assumptions are incorrect, please contact your system administrator before continuing – notwithstanding this, feel free to read on.

Subsections of System Configuration

Classifications

Introduction to Classifications

The classification system within the Metrix Asset Management System is the framework through which asset & component behaviour is controlled. The classification configuration can control the availability of system resources for a given asset/component such as custom data attributes, available task records, available intervention treatments, condition capture requirements, and more.

Subsections of Classifications

About

This section contains basic information about classifications in the Metrix Asset Management system.

Subsections of About

Classification Structure

Below is a representation of the asset classification structure within the Metrix Asset Management System. Each asset classification structure is broken into four levels being asset class, asset type, asset sub-type, and asset group. Each of these levels are hierarchical in that:

  • Asset classes contain one or more asset types,
  • Asset types contain one or more asset sub-types, and
  • Asset sub-types contain one or more asset group.

Each asset in your Metrix Asset Management System will be assigned to an asset classification at the asset group level. Then, within the asset group definition is one or more component group definitions. Each component assigned to the asset will be ascribed to one of these component groups.

Example

The following is an example of an Asset Class, Asset Type, Asset SubType, Asset Group, and Component Group represented as a string:

Transportation - Road Infrastructure - Local Roads - Sealed Roads - Surface

A Component in the above Component Group would be associated with a Sealed Local Road in the Entities Road Infrastructure Transportation Asset stock.

Classification IDs

Using the correct ID is important when accessing Metrix via APIs or using CSV file imports. The following details the ID values that can be used for classification references.

Asset Classification ID

The asset classification ID references a classification structure down to the asset group level. Once a classification has been created, the ID value (which will remain constant regardless of classification alterations) can be found at the top of the classification configuration screen, below the ‘Classification Label’.

Component Group ID

The component group ID references a specific component group within a greater asset classification reference.Once a classification has been created, the ID value (which will remain constant regardless of classification alterations) can be found at the top of the classification configuration screen, below the ‘Classification Label’.

How To Guides

This section contains how to guides with respect to classifications in the Metrix Asset Management system.

Subsections of How To Guides

Navigating Classifications

To view your asset classifications:

  1. Navigate to the system menu in the upper right-hand corner of the application and select the “Assets” option.

  2. On the left-hand side of the application, you will notice a list of menu items. The Asset & Component Classification section is contained within the first option labelled, “Classifications”. If it is not already active, click on “Classifications”.

  3. This “Classifications” management screen is broken down by asset class and then each class is segmented by the class’s types, the type’s sub-types, and lastly, the sub-type’s groups (asset group then contain one or more component types).

    To navigate the classification structure, simply choose an asset class, and then the type/sub-type/group combination your desire. The corresponding configuration and available component types will then be shown.

Creating Classifications

To create a new asset classification definition, you will need to have prepared the following pieces of information:

  • The asset class name, or the name of an existing asset class that will contain the new classification asset type.

  • The asset type name, or the name of an existing asset type that will contain the new classification asset sub-type.

  • The asset sub-type name, or the name of an existing asset sub-type that will contain the new classification asset group.

  • The asset group name.

To get started, click on “Create New Classification” on the “Classification” management page. A dialog box will appear to prompt you through the following steps.

  1. Firstly, you need to select or define the asset class name for your new asset classification. Click on the “Select (or define new) class” drop down control and either select from the existing list of asset class names or create a new asset class by typing it into the input box and clicking “Add”.

  2. Once the asset class is selected or inputted, the system will prompt for the asset type name that belongs to the above asset class.

  3. Repeat the process defined in step 1 for asset type, asset sub-type, and asset group.

  4. With the asset group defined, the system will then prompt for the component type definition(s).

  5. The default “Composite” component type can be either left in place, r renamed.

  6. To add additional component types, simple click “New Component Type” and provide a name for the definition.

  7. Once satisfied with the new classification structure, click “Create Classification”. Your new classification will now be available for use.

Info

Every classification structure must have at least one (1) defined component type. By default, each classification is pre-seeded with a standard component type called “Composite”.

Users may remove the “Composite” component type definition only when they define at least one (1) alternative component type.

Adding Component Groups to Classifications

If you have a pre-existing classification definition (class / type / sub-type / group) but you wish to further refine available component types by adding additional options, you can choose to create component types against existing asset classifications. To do so, select the desired asset classification from the “Classifications” management page, and complete the following steps:

  1. In the “Classification Configuration” panel (on the right-hand side of the page), click on “New Component Type”.

  2. For component type creation, there are two initial options under the ‘Add Mode’ section. You can create a component type from blank, or you can create a component type and base it’s initial configuration against a difference component type’s definition.

    From Blank

    To create from blank, simply type the new component type name in the input box and click “Create”.

    From Existing

    To create from an existing component type, select the desired component type definition to copy, and then type the new component type name into the input box. Click “Create” when ready.

  3. Type the name of the new Component type.

  4. Once finished, click ‘Create’ and your new component type will be ready for configuration.

Deleting Component Groups from a Classification

When a component group is no longer required within the scope of an asset classification, the Metrix Asset Management system provides functionality for administrators to permanently remove it from the system.

Warning

Deleting component groups cannot be undone. The following restrictions also apply when it comes to deleting component groups:

  • Component group cannot be in use: If the component group is in use by any components, regardless of status, then the component group cannot be deleted.
  • Asset classification must have at least ONE (1) component group: If the component group is the last/only group within the parent asset classification, then the component group cannot be deleted.

To delete a component group from an asset classification, follow these steps:

  1. To begin, navigate to the component group within the asset classification using the ‘Classifications’ page. (Assets Menu > Classifications > Selected Classification > Selected Component Group).

  2. Click on ‘Edit Configuration’ to enter allow editing the classification definition.

  3. This will convert the view to an editing mode with some additional options. Make sure you have the desired component group selected (for delete) before continuing.

  4. Click on ‘Delete Component Classification’ in the upper right-hand corner of the component configuration breakdown. If the button is not enabled, this means that the component cannot be deleted (see warning notes, above).

  5. In the subsequent dialog, confirm your decision by clicking ‘Delete’.

  6. The component group will now be permanently deleted from the system.

Deleting Asset Classifications

When an asset classification is no longer required, the Metrix Asset Management system provides functionality for administrators to permanently remove it from the system.

Warning

Deleting asset classifications cannot be undone. The following restrictions also apply when it comes to deleting asset classifications:

  • Asset classification cannot be in use: If the asset classification is in use by any assets, regardless of status, then the classification cannot be deleted.

To delete an asset classification, follow these steps:

  1. To begin, navigate to the asset classification using the ‘Classifications’ page. (Assets Menu > Classifications > Selected Classification).

  2. Click on ‘Edit Configuration’ to enter allow editing the classification definition.

  3. This will convert the view to an editing mode with some additional options. Note: the selected component group will not have any impact on this process.

  4. Click on ‘Delete Asset Classification’ in the upper right-hand corner of the parent asset classification configuration breakdown. If the button is not enabled, this means that the asset classification cannot be deleted (see warning notes, above).

  5. In the subsequent dialog, confirm your decision by clicking ‘Delete’.

  6. The asset classification will now be permanently deleted from the system.

Form Management

The form manager in the Metrix Asset Management System offers a fully customisable solution for managing all types of asset attribute data. The original concept behind the form manager was to give users the freedom of recording the information that matters to their organisation without needing to fit within predefined system limits.

The following sections provide instruction on you can create your own custom form using the Metrix form manager to achieve the above features.

Subsections of Form Management

About

This section contains basic information about form specifications in the Metrix Asset Management system.

Subsections of About

Form Definitions

The form manager allows users to create forms to capture data in a controlled yet customisable manner. It does this by providing:

  • Unlimited data field count.

  • User defined data types including:

    • Text fields
    • Number fields
    • Date fields
  • List fields that give end-users a range of options to choose from for the answer.

  • The ability to mark fields as required.

  • Form sections to improve readability.

It should be noted that there are several functions within the system that support custom form definitions. These include, but are not limited to:

  • Custom attribute forms for assets and components,

  • Task Type forms, and

  • Mobile Data Capture custom forms.

As such, the steps involved in initiating a new form definition can differ from case to case. However, once the form has been established, the construction and manipulation of the form’s attributes and layout is identical between cases.

How To Guides

This section contains how to guides with respect to form specifications in the Metrix Asset Management system.

Subsections of How To Guides

Creating Forms

This section covers the necessary steps involved in creating a new form definition within the Metrix Asset Management System.

Info

With regards to Custom Attribute Forms, simply creating a form does NOT make it available for use. You still need to assign the form to the Classification(s) that should use the form.

To create a new form definition within Metrix, complete the following steps:

  1. From the Form Manager page within the Metrix configuration section, click on ‘Create New Form’.

  2. On the right-hand side, a new default form definition will appear. This layout is the same for all types of form designers within the Metrix Asset Management System. That is, form element management on the left, form structure in the middle, and a form preview on the right.

  3. Firstly, in the text input at the top of the form designer, give you form a title – this value is defaulted to ‘New Form’. Simply overwrite that value with the title of your form.

Adding fields to a form definition
  1. Next, try adding a new field to the form definition. To do this, simply choose from the new attribute templates on the left-hand side of the form designer. Each of these templates offer a distinct set of default attribute field constraints, including:

    a. Text: A free text input field with no restrictions

    b. Whole Number: A numeric input field that restricts entries to whole numbers only.

    c. Decimal Number: A numeric input field that allows entry of numbers to decimal precision.

    d. Date: A calendar-based input field that allows users to pick date values.

    e. List: An empty option row configuration. Once configured, users will need to choose from the list of options presented.

    f. Yes/No: A preconfigured option row field. This is pre-populated with two options – ‘Yes’ and ‘No’.

  2. Once you add the field, you will be presented with the attribute field configuration dialog.

  3. In this dialog, you can alter the attribute label – this is defaulted to ‘New Field’ and should be replaced before you can commit the field.

  4. Another option to set is the ‘Help’ option for the field. Attribute help, if set, will be shown to the user when they hover or click on the question-mark icon next to the field in the form layout. This can be a short sentence giving context to the attribute.

  5. The ‘Required’ checkbox will allow you to set this attribute as NOT optional. This will mean users cannot save an entry until they fill out this specific (and any other required) attribute(s).

  6. Lastly, for attribute configuration, you can alter the ‘Data Type’ and ‘Attribute Control’. These two settings essentially enable you to essentially overwrite the initial attribute template you chose in step 4. For example, assuming that you selected a ‘Text’ attribute template, you could change this to a ‘Whole Number’ for the ‘Data Type’ and/or ‘Options List’ for the ‘Attribute Control’.

Additional settings for ‘Options List’ Attributes
  1. When the ‘Attribute Control’ is set to ‘Options List’ there are additional configuration steps that need to be completed before committing the attribute definition. That is, to set the option array that the user will be presented with. In the screenshot below, the attribute example has been configured with two (2) options – ‘Yes’ and ‘No’.

    The list contains four (4) columns. From left to right, they are:

    a. Label: This is the text that is displayed to the user.

    b. Value: This is the value that is stored as the actual attribute value.

    c. Is Active: This checkbox allows you to disable certain options from an Options List array.

    d. Delete (untitled): On the far right-hand side of each Options List configuration is a ‘minus’ symbol. This represents the ability to remove an Options List option from the configured list.

  2. To add an option to the Options List configuration, simply click ‘Add Option’ at the base of the existing list. Fill out the ‘Label’ and ‘Value’ for the new option.

Adding Core Metric fields to a form definition
  1. In addition to ‘Attribute Templates’, the left-hand panel also contains various predefined ‘Core Metric Field’ definitions that can be added to the form. These fields are special in the following ways:

    a. Metric fields can be used as a Data Filter.

    b. Metric fields can be used to define a Map Theme.

  2. A ‘Core Metric Field’ definition is hard coded as a ‘Decimal Number’ field that is NOT marked as required. The following fields are preconfigured in the system:

    a. Length,

    b. Height,

    c. Width,

    d. Area,

    e. Depth,

    f. Diameter,

    g. Volume.

  3. It should be noted that any single Core Metric Field can only be used once per form definition. That is, you cannot add ‘Height’ more than once to any one form – it can, however, be used on as many separate forms as you wish.

Managing Form Layout
  1. With the desired attributes established on your form definition, you may wish to tweak the layout in one or more ways. The Metrix form designer allows users to do such quickly and easily.

  2. To relocate an attribute within the form definition, you can click on the arrow up/down buttons on the centre form structure layout when in edit mode.

  3. To remove a field from a form definition, you can click on the trash-can icon on the right-hand side on the field within the form definition.

Managing Form Groups
  1. Lastly, one or more attribute fields can be grouped within a form section. To create a new field group, simply click ‘New Section’ on the left-hand side of the form designer (beneath the Core Metric Fields picker).

  2. To move fields into the section, simply move the field up or down until its position is within the section outline. It should be noted that each group will default to the bottom of the existing form definition layout.

  3. To rename a form group, click on the ‘Edit’ icon (pencil) next to the current group title. Replace the current title and save that change.

  4. Form groups (and all of the attributes within that group) can be moved up and down the form in the same manner as individual attribute fields. To do so, use the up/down arrows beneath the group title.

  5. To remove a form group from the form definition, click on the menu option (next to the up/down buttons). There are two options:

    a. Remove Section: This will remove the form group from the definition, but any attributes that were a part of that group will be retained, and simply left as un-grouped attributes.

    b. Remove Section and Fields: This will remove the form group as well as any of the attributes that were part of that group.

Editing Existing Forms

From time to time, it becomes necessary to edit the structure or contents of an existing attribute form. To do this, use the following steps as a guide:

  1. Navigate to the form manager page (Assets Menu > Form Manager > Selected Form).

  2. With the form you wish to edit selected, simple click on the ‘Edit Form’ button at the top of the form preview.

  3. From here, the steps to alter the form contents are identical to creating a new form.

  4. When you have finished the alterations, click on ‘Save Changes’. Alternatively, click ‘Cancel’ to revert to the original form.

Info

Removing a field from a form definition will NOT have any impact on any existing data stored against that field throughout your environment. It will just suppress that information from being displayed and stop future entry of values against it.

Assigning Forms to Classifications

Once a form definition has been constructed, you can assign it to a specific classification (or a set of classifications) in order to use that form in production.

Info

This process relates to Custom Attribute form definitions only. For other form types, see the relevant section of this user guide for implementing the form in production.

  1. To begin assigning a form to a classification or set of classifications, navigate to that form within the Form Manager page (Assets Menu > Form Manager > Selected Form).

  2. Underneath the form title, there is an ‘Actions’ button – this type of button is implemented system wide as an indicator of additional options to manage a resource.

  3. From the ‘Actions’ menu, choose ‘Manage Classification Links’.

  4. A dialog box will appear with lists of available links that could be made. On the left-hand side, are Asset Classifications. On the right-hand side, are Component Classifications. These break down as follows:

    • Assigning a form to an Asset Classification will make the form behave as a custom form for an entire asset. That is, all Components of that Asset will share the attributes on that form.

    • Assigning a form to a Component Classification will only make the form available when users are editing that specific Component Type. Each Component within an Asset can have different form definitions (i.e. base vs seal forms).

  5. To assign a form to a classification, simply click ‘Assign’ next to that classification title.

  6. To unassign a form from a classification, simply click ‘Unassign’ next to that classification title.

  7. The system will manage the availability of the above buttons based on the form state in the system.

Using the filter options
  1. When there are a great number of Classification configurations to wade through, it can become difficult to find the one you are after. This is where the filter option comes in handy. To filter the classification list, simply click on the ‘Filter’ icon at the top of the classification list – the icon looks a little like a funnel.

  2. To filter by a specific letter or set of letters, simply type them into the text input that will appear above the classification list.

  3. To filter by classifications that already have the form assigned, mark the checkbox titled ‘Show Assigned Only’.

Deleting Forms

When a form is no longer required, the Metrix Asset Management system provides functionality for administrators to permanently remove it from the system.

Warning

Deleting form definitions cannot be undone. The following restrictions also apply when it comes to deleting forms:

  • Form definition cannot be in use: If the form definition is currently assigned to any asset or component classification, then it cannot be deleted.

To delete a form definition, follow these steps:

  1. To begin deleting a form definition, navigate to that form within the Form Manager page (Assets Menu > Form Manager > Selected Form).

  2. Underneath the form title, there is an ‘Actions’ button – this type of button is implemented system wide as an indicator of additional options to manage a resource.

  3. From the ‘Actions’ menu, choose ‘Delete Form’. If the button is not enabled, this means that the form cannot be deleted (see warning notes, above).

  4. In the subsequent dialog, confirm your decision by clicking ‘Yes delete this form’.

  5. The form will now be permanently deleted from the system.

Task Types

Task Types, in the Metrix Asset Management System, provides a means for users to record multiple pieces of information against a single component over time.

The following sections contain instruction on you can create your own task types accompanied by a robust form design using the Metrix form manager.

Subsections of Task Types

About

This section contains basic information about task type specifications in the Metrix Asset Management system.

Subsections of About

Task Types

A Task Type specification is backed by the built-in form manager (see Form Management ) delivering the same freedom to record the information that matters to your organisation, without needing to fit within any predefined system limits. Each task definition is essentially an attribute form that can be posted against a component many times – to track the changes over time.

In information management speak, the task definitions offer one-to-many relationship capabilities.

Further to the above, a task definitions can also be linked to one or more attached documents and/or images. These attachments can be used to provide additional context to the task definition. When mobile application users interface with the task definition, they can view the attachments and download them to their device for offline. Sample use cases for task definition attachments include:

  • A photo of a damaged component
  • A PDF of a service manual
  • A photo of a completed task

How To Guides

This section contains how-to-guides with respect to task type specifications in the Metrix Asset Management system.

Subsections of How To Guides

Creating Task Types

This section covers the necessary steps involved in creating a new task type definition within the Metrix Asset Management System. As the task types are backed by the form management system (see Form Management ), after a certain point the instructions will defer to the directions on creating/managing a form definition.

Info

As with the custom attribute forms, simply creating a task type definition does NOT make it available for use. You still need to assign the task type to the Classification(s) that should use it.

To create a new task type definition within Metrix, complete the following steps:

  1. Navigate to the ‘Task Types’ management page (Assets Menu > Task Types).

  2. Click on ‘Create New Task Type’ at the top of the page

  3. This will create and display a default task type definition with a single form field, ‘Comment’.

  4. Replace the Task Type Name (‘New Form’) with a task name that relates to the new task, and then begin editing the task type form layout. For this, follow the steps outlined in Creating a new Form.

Editing Existing Task Types

From time to time, it becomes necessary to edit the structure or contents of an existing task type specification. To do this, use the following steps as a guide:

  1. Navigate to the task types manager page (Assets Menu > Task Types > Selected Task Type).

  2. With the task type you wish to edit selected, simple click on the ‘Edit’ button at the top of the preview.

  3. From here, the steps to alter the form contents are identical to creating a new form.

  4. When you have finished the alterations, click on ‘Save Changes’. Alternatively, click ‘Cancel’ to revert to the original form.

Info

Removing a field from a task type definition will NOT have any impact on any existing data stored against that field throughout your environment. It will just suppress that information from being displayed and stop future entry of values against it.

Task Type Attachments

Task Type attachments are used to provide additional context to a task definition. When mobile application users interface with the task definition, they can view the attachments and download them to their device for offline use. To add an attachment to a task definition, follow these steps:

  1. Navigate to the ‘Task Types’ management page (Assets Menu > Task Types).
  2. With the task type you wish to attach to selected, simple click on the ‘Add Attachments’ button at the top of the preview.
  3. This will open a dialog box where you can upload the attachment. Supported file types include images, PDFs, and other common document formats.
  4. Please note, that there is also the option to link to an existing attachment. This is useful when the attachment is already stored in the system, and you wish to link/share it with another task definition.
  5. Once the attachment is uploaded, it will be displayed in the task type preview. You can add multiple attachments to a single task definition.

Assigning Task Types to Classifications

Once a task type has been constructed, you can assign it to a specific classification (or a set of classifications) to use in production.

  1. To begin assigning a task type to a classification or set of classifications, navigate to that task type within the Task Type page (Assets Menu > Task Types > Selected Task Type).

  2. Underneath the task type title, there is an ‘Actions’ button – this type of button is implemented system-wide as an indicator of additional options to manage a resource.

  3. From the ‘Actions’ menu, choose ‘Manage Classification Links’.

  4. A dialog box will appear with lists of available links that could be made. On the left-hand side, are Asset Classifications. On the right-hand side, are Component Classifications. These break down as follows:

    • Assigning a task type to an Asset Classification will make the task type available on the ‘Parent Asset’ tab of all child Components. That is, all Components of that Asset will share the task type.

    • Assigning a task type to a Component Classification will only make the task type available when users are editing that specific Component Type. Each Component within an Asset can have different task type links definitions (i.e. base vs seal forms).

  5. To assign a task types to a classification, simply click ‘Assign’ next to that classification title.

  6. To unassign a task type from a classification, simply click ‘Unassign’ next to that classification title.

  7. The system will manage the availability of the above buttons based on the form state in the system.

Using the filter options
  1. When there are a great number of Classification configurations to wade through, it can become difficult to find the one you are after. This is where the filter option comes in handy. To filter the classification list, simply click on the ‘Filter’ icon at the top of the classification list – the icon looks a little like a funnel.

  2. To filter by a specific letter or set of letters, simply type them into the text input that will appear above the classification list.

  3. To filter by classifications that already have the task types assigned, mark the checkbox titled ‘Show Assigned Only’.

Deleting Task Types

When a task type is no longer required, the Metrix Asset Management system provides functionality for administrators to permanently remove it from the system.

Warning

Deleting task type specifications cannot be undone. The following restrictions also apply when it comes to deleting task types:

  • Task Type definition cannot be in use: If the task type is currently assigned to any asset or component classification, then it cannot be deleted.
  • Task Type definition cannot have tasks recorded against it: If there are any tasks recorded against the task type, then it cannot be deleted.

To delete a task type definition, follow these steps:

  1. To begin deleting a task type definition, navigate to that task type within the Task Type management page (Assets Menu > Task Types > Selected Task Type).

  2. Underneath the task type title, there is an ‘Actions’ button – this type of button is implemented system-wide as an indicator of additional options to manage a resource.

  3. From the ‘Actions’ menu, choose ‘Delete’. If the button is not enabled, this means that the task type cannot be deleted (see warning notes, above).

  4. In the subsequent dialog, confirm your decision by clicking ‘Yes, delete’.

  5. The task type definition will now be permanently deleted from the system.

Intervention Treatments

Intervention Treatments in the Metrix Asset Management System provide the ability for users to store and manage unit rates and default useful lives for a variety of component interventions. Furthermore, any rationale used in determining the unit rate information for a given intervention treatment can be stored as an attachment against that treatment for later reference.

The unit rate information and default useful life capacity of intervention treatments are pivotal to many of the predicted cost and consumption metrics within the system. Additionally, when used in conjunction with the system’s Next Treatment logic, the intervention treatments provide for more reliable costing of impending capital works programs.

The following sections provide instruction on you can create your own intervention treatments within the Metrix Asset Management System.

Subsections of Intervention Treatments

About

This section contains basic information about intervention treatment definitions in the Metrix Asset Management system.

Subsections of About

Treatment IDs

Using the correct ID is important when accessing Metrix via APIs or using CSV file imports. The following details the ID values that can be used for treatment code references.

Treatment Definition ID

The treatment ID is the only way to make a valid reference to an intervention treatment from external locations such as API calls or CSV Data Imports. Once a treatment definition has been created, the ID value (which will remain constant regardless of alterations) can be found in the treatment preview under the section labelled, ‘Code’.

Treatment Cost Methods

Each intervention treatment unit rate will be based off one of the following three (3) ‘Cost Rate Methods’:

  • Unit Rate: when the calculation of a components value is dependent on the size (or amount) of the component. The Unit Rate is multiplied by the component ‘Cost Unit’ value to yield the calculated cost. For Unit Rate, the formula for replacement cost is:

    $$\lbrack Unit\ Rate\rbrack\ \times \ \lbrack Component\ Cost\ Units\rbrack$$
  • Fixed Value: when the components value is a known fixed figure. No calculation occurs for Fixed Value costs. For Fixed Value, the formula for replacement cost is:

    $$\lbrack Unit\ Rate\rbrack$$
  • Network Asset: when the individual cost of the component is negligible; at a network level however, the cost of a large collection of said components is substantial, and that is what is stored. To calculate individual component cost of a Network Asset, the proportionate share of ‘Cost Units’ of the component is multiplied by the Network Asset value. For Network Assets, the formula for replacement cost is:

    $$\frac{\lbrack Unit\ Rate\rbrack}{\Sigma\lbrack Network\ Cost\ Units\rbrack} \times \lbrack Component\ Cost\ Units\rbrack$$
Example
Unit Rate

Consider the road surface component of a road Asset. The ‘Cost Units’ of the component relates to the area (square metres) of the surface - say 1200 m^2^. The unit rate of the treatment is $3.25. The replacement cost of the Component is therefore:

$$\$1200 \times 3.25 = \$3900$$
Fixed Value

Consider a shade structure. The fixed value of the treatment is $6500. The replacement cost is therefore:

$$\$6500$$
Network Asset

Consider a network of street bins. The network rate of the treatment is $15,000 (which is the total cost of all the bins in the network). The network consists of 100 bins; 80 of these are standard street bins, 20 are premium street bins. To cater for the difference in the individual costs, the ‘Cost Units’ for the standard street bins is 1, and 2 for the premium street bins.

The individual cost for a standard street bin is therefore:

$$ \frac{\$ 15000}{(80\ \times 1) + (20\ \times 2)}\ \times 1\ = \$ 125 $$

The individual cost for a premium street bin is:

$$ \frac{\$ 15000}{(80\ \times 1) + (20\ \times 2)}\ \times 2\ = \$ 250 $$

How To Guides

This section contains how to guides with respect to intervention treatment definitions in the Metrix Asset Management system.

Subsections of How To Guides

Creating Intervention Treatments

This section covers the necessary steps involved in creating a new intervention treatment within the Metrix Asset Management System. This extends to the initial creation of the treatment with basic field values. In subsequent sections, details such as attachments, bulk creation, and history will also be detailed.

Info

As with most resources within Metrix, simply creating an intervention treatment does NOT make it available for use. You still need to assign the intervention treatment to the Classification(s) that should use it.

To create a new intervention treatment within Metrix, complete the following steps:

  1. Navigate to the ‘Treatments’ management page (Assets Menu > Treatments).

  2. Click on ‘Create New Treatment’ at the top of the page.

  3. This will create and display a default treatment definition on the right-hand side of the page.

  4. From here, you will first need to set the ‘Treatment Name’ and provide a short ‘Description’ for the new intervention treatment. Simply type these values into the corresponding form fields.

  5. Next, you will need to choose the ‘Cost Method’ of the intervention treatment. See (see Background for more information on choosing an appropriate method.

  6. With the ‘Cost Method’ chosen, the interface will react by asking for follow up information related to this method. Firstly, you will need to set the ‘Unit of Measure’ for the intervention treatment. This is a free text field and is typically populated with values such as ‘metres’, ‘square metres’, and the like.

  7. Next, set the ‘Unit Rate’ value – this is the dollar value unit rate for the treatment.

  8. Lastly, set the optional ‘Default Useful Life’ field. This value, if set, will provide a suggested useful life to users applying this treatment to components.

  9. Once all fields are completed as desired, click ‘Create’. The treatment has now been created.

Creating Intervention Treatments in Bulk

Given the breadth of scope surrounding intervention treatments, it can become overwhelming to consider keying each definition into the system manually. For this reason, the Metrix Asset Management System supports importing bulk treatment definitions through simply pasting compatible Excel/CSV data rows. The following instructions guide you through using this bulk import process.

  1. Navigate to the Treatments management page (Assets Menu > Treatments).

  2. Next to the ‘Create New Treatment’ button, click on the ‘Actions’ menu.

  3. From the drop-down options, select ‘Import Treatments from CSV’.

  4. A dialog will appear with an input for pasting Excel/CSV data, and some basic instructions on use. Before proceeding, consider the following notes on data formatting.

    a. The pasted data should NOT contain the header row.

    b. The pasted data should contain the following fields (in this specific order):

    1. Treatment
    2. Description
    3. Cost Method ID (see below for details)
    4. Unit Rate
    5. Unit of Measure
    6. Default Useful Life

    c. With regards to the Cost Method ID, the accepted values are:

    • For Unit Rate, use $ unit\_rate $
    • For Network Rates, use $ network\_assets $
    • For Fixed Rate, use $ fixed\_value $.
  5. Paste your formatted data into the text box.

  6. A preview of your pasted data will appear in a table view below the text box. Any errors will be highlighted in this preview.

  7. To confirm the creation of the previewed treatments, click ‘Save’ below the preview table. Alternatively, click ‘Clear’ to cancel.

  8. The imported treatments will now be created.

Editing existing Intervention Treatments

As conditions over time adjust, it becomes necessary to maintain your treatment definitions to reflect the new normal. Typically, this means updating unit rates, and/or default useful lives. To edit an existing intervention treatment, follow these steps:

  1. Navigate to the desired Intervention Treatment (Assets Menu > Treatments > Selected Treatment).

  2. With the desired treatment selected, an editable preview of the definition will appear on the right-hand side of the page.

  3. Enter the required alterations to the selected treatment.

  4. Once complete, simply click ‘Update’ to commit the changes.

Attaching Information to Intervention Treatments

Given the amount of detail that goes into calculating treatment unit rates and default life values, there is often a large amount of supporting documentation around the intervention treatments inside the Metrix Asset Management System. To assist with managing this information, the system makes it easy to upload these documents against the treatment definition directly. To do so, follow these steps:

  1. Navigate to the desired Intervention Treatment (Assets Menu > Treatments > Selected Treatment).

  2. With the treatment selected, a preview of the treatment definition will appear on the right-hand side of the page.

  3. At the bottom of this preview, is an ‘Actions’ menu that provides additional management options for the selected treatment. Click on the ‘Actions’ menu.

  4. From the drop-down menu, choose ‘Manage/View Attachments’.

  5. The standard Metrix attachments interface will then display in a new dialog box. Any existing attachments will be displayed, as well as an option to upload additional documents.

  6. To create a new attachment against the selected treatment, you can do one of the following:

    a. Drag and drop the file into the ‘drop space’ denoted by a dashed line. The attachment will immediately upload and be linked to the treatment.

    b. Choose the file from your file system using the file picker. To do this, click ‘Select File for Upload’ and then choose the desired file from the file picker. The attachment will immediately upload and be linked to the treatment.

    c. Choose from an existing attachment that is already linked to another Intervention Treatment. To do this, click ‘Link to an Existing Upload’ and choose the attachment from the subsequent list. This will mean that you do not have multiple copies of the same attachment but can still access it from many treatments.

  7. Once finished, simply close the dialog box.

Viewing Intervention Treatment History

At any time in the Metrix Asset Management System, you can see the status of a treatment at any time in its history. To do so, follow these steps:

  1. Navigate to the desired Intervention Treatment (Assets Menu > Treatments > Selected Treatment).

  2. With the desired treatment selected, an editable preview of the definition will appear on the right-hand side of the page.

  3. At the bottom of this preview, is an ‘Actions’ menu that provides additional management options for the selected treatment. Click on the ‘Actions’ menu.

  4. From the drop-down menu, choose ‘Show Treatment History’.

  5. A dialog box will appear, showing the earliest record of the current intervention treatment.

  6. At the bottom of this preview are two arrows for navigating through historic versions of the treatment.

  7. Just above these arrows, is an ‘Updated on’ field detailing when the change occurred.

Assigning Intervention Treatments to Classifications

Once a treatment definition has been constructed, you can assign it to a specific classification (or a set of classifications) in order to use that treatment in production as either a component current treatment, or next treatment.

  1. To begin assigning treatment to a classification or set of classifications, navigate to that treatment within the Intervention Treatment page (Assets Menu > Treatments> Selected Treatment).

  2. With the desired treatment selected, an editable preview of the definition will appear on the right-hand side of the page.

  3. At the bottom of this preview, is an ‘Actions’ menu that provides additional management options for the selected treatment. Click on the ‘Actions’ menu.

  4. From the ‘Actions’ menu, choose ‘Manage Classification Links’.

  5. A dialog box will appear with lists of available links that could be made. It should be noted that only Component Classification links are valid for Intervention Treatments.

  6. To assign a treatment to a classification, simply click ‘Assign’ next to that classification title.

  7. To unassign a treatment from a classification, simply click ‘Unassign’ next to that classification title.

  8. The system will manage the availability of the above buttons based on the form state in the system.

Using the filter options
  1. When there are a great number of Classification configurations to wade through, it can become difficult to find the one you are after. This is where the filter option comes in handy. To filter the classification list, simply click on the ‘Filter’ icon at the top of the classification list – the icon looks a little like a funnel.

  2. To filter by a specific letter or set of letters, simply type them into the text input that will appear above the classification list.

  3. To filter by classifications that already have the treatment assigned, mark the checkbox titled ‘Show Assigned Only’.

Deleting Intervention Treatments

When a treatment is no longer required, the Metrix Asset Management system provides functionality for administrators to permanently remove it from the system.

Warning

Deleting treatment definitions cannot be undone. The following restrictions also apply when it comes to deleting treatments:

  • Intervention treatment cannot be in use: If the treatment definition is currently assigned to any component within the system, regardless of status, then it cannot be deleted.

To delete a treatment definition, follow these steps:

  1. To begin deleting an intervention treatment, navigate to that treatment (Assets Menu > Treatments > Selected Treatment).

  2. On the bottom right-hand side of the treatment preview, there is an ‘Actions’ button – this type of button is implemented system wide as an indicator of additional options to manage a resource.

  3. From the ‘Actions’ menu, choose ‘Delete Treatment’. If the button is not enabled, this means that the treatment cannot be deleted (see warning notes, above).

  4. In the subsequent dialog, confirm your decision by clicking ‘Delete’.

  5. The treatment will now be permanently deleted from the system.

Condition Functions

Condition Functions in the Metrix Asset Management System provide the ability for users to tailor their condition assessment methodologies for both individual component types as well as globally. A Condition Function is a scored and weighted questionnaire designed to lead inspectors through their review of asset quality, function, and performance. In addition to the weighted matrices, a condition function offers the capacity for ancillary information gathering at the time of the inspection with ’non-weighted’ questions.

Further to the above, a condition function can also be linked to one or more attached documents and/or images. These attachments can be used to provide additional context to the condition function. When mobile application users interface with the condition function, they can view the attachments and download them to their device for offline. Sample use cases for condition function attachments include:

  • A photo of a component in Excellent condition
  • A PDF manual guiding users through the condition ranges

The following sections provide instruction on you can create your own condition functions within the Metrix Asset Management System.

Subsections of Condition Functions

About

This section contains basic information about condition function definitions in the Metrix Asset Management system.

The fundamental principle of condition functions within the Metrix Asset Management System is a guided questionnaire that accumulates weighted scores throughout its completion – with the ultimate score yielding a condition result.

Further to the above, a condition function can also be linked to one or more attached documents and/or images. These attachments can be used to provide additional context to the condition function. When mobile application users interface with the condition function, they can view the attachments and download them to their device for offline. Sample use cases for condition function attachments include:

  • A photo of a component in Excellent condition
  • A PDF manual guiding users through the condition ranges

Subsections of About

Condition Function Scoring

The fundamental principle of condition functions within the Metrix Asset Management System is a guided questionnaire that accumulates weighted scores throughout its completion – with the ultimate score yielding a condition result. There is no limit on the number of questions that can be set within a condition function. The only requirement is that the total weight of scored results sums to 100. See below for an example condition function.

Question 1 - Weight 40% - Are there any potholes occurring throughout the segment?

Options Option Score
No potholes 0 points
Few individual potholes seen 40 points
Potholes occurring in clusters 80 points
Potholes grouped throughout segment 100 points

Question 2 - Weight 30% - Are the any shoves occurring throughout the segment?

Options Option Score
No shoves 0 points
One shove formed outside of travel lane 50 points
Multiple shoves and/or Shoves within travel lane 100 points

Question 3 - Weight 30% - Is there evidence of Cracking or Flushing?

Options Option Score
None 0 points
Minor cracking evident 20 points
Moderate cracking evident 60 points
Significant cracking or flushing evident 100 points

Using the above example condition function as a template, the following results would be generated by the system as condition results.

Question Answer Points Weighted Result
1 Few individual potholes seen 40 $ 40 \times 40\% = 16 $
2 One shove formed outside of travel lane 50 $ 50 \times 30\% = 15 $
3 Moderate cracking 60 $ 60 \times 30\% = 18 $
49 out of 100
Info

The weighted condition score is always out of 100 – with 100 being a poor condition and 0 being excellent. Metrix will map these scores to a default condition scale of 1-5 and these scales can be set by system administrators.

A score of 49/100 would map to a condition of 2.

The Metrix Asset Management System comes pre-configured with a default condition function for use by any newly created classifications. This function has one (1) question with five (5) answer options detailed below:

Question: Condition (Weight 100%)

Options Option Score
1 0 points
2 20 points
3 60 points
4 80 points
5 100 points

As seen above, the default condition function simply defers the condition result to the end user’s subjective assessment.

How To Guides

This section contains how to guides with respect to condition function definitions in the Metrix Asset Management system.

Subsections of How To Guides

Creating Condition Functions

This section covers the necessary steps involved in creating a new condition function within the Metrix Asset Management System. This extends to the initial creation of the function with scored & weighted questions, as well as additional information fields. In subsequent sections, details such as editing functions and assigning functions to component classifications is discussed.

Info

As with most resources within Metrix, simply creating a condition function does NOT make it available for use. You still need to assign the condition function to the Classification(s) that should use it.

By DEFAULT, all component classifications are initialised to utilise the built- in condition function which essentially requires users to choose a value between 1 and 5 to reflect the component condition.

To create a new condition function within Metrix, complete the following steps:

  1. Navigate to the ‘Condition functions’ management page (Assets Menu > Condition functions).

  2. Click on ‘Create New Condition Function’ at the top of the page.

  3. This will initialise and display a default condition function definition on the right-hand side of the page.

  4. From here, you will first need to set the ‘Function Name’ and provide a short ‘Description’ for the new condition function. Simply type these values into the corresponding form fields.

  5. Next, you will define the condition score factors for the new condition function. This will form the set of questions asked of the user in order to derive a final condition score.

Defining Condition Score Factors
  1. To initialise your first condition score factor, simply click on the ‘Add Condition Score Factor’ button.

  2. Each condition score factor you define will require the following:

    a. Enter a Factor Label - this is the question that will be asked of the end user.

    b. Confirm a Factor Weight for the score.

    c. For each answer Option, provide an Option Label and Score.

    To perform the above steps, simply type these values into the corresponding form fields. In the screenshot below, the Factor Label has been set to ‘Question Label’, the Factor Weight has been set to 60%, the Option Label has been set to ‘First Option’ and the Option Score was set to 56.

  3. To add more options to the condition score factor, simply click ‘Add Option’ and fill out the new Option Label and Option Score.

  4. To add additional condition score factors, simply click on ‘Add Condition Score Factor’.

Info

You can learn more about the structure and purpose of Condition Functions within these docs. See Initialising a Metrix account for further details.

Defining Extra Information Fields
  1. The Extra Information Fields allow you to create additional inputs for users to populate when completing condition assessments using the new condition function. An extra information field does not contribute to the overall condition score - rather, provides any required context you may wish to collect.

    To add new extra information fields to your condition function, simply click ‘Add Extra Information Field’.

  2. Each extra information field you define will require the following:

    a. Enter a field label - this is the question that will be asked of the end user.

    b. If applicable, mark the extra field as required by ticking the checkbox, ‘Required’.

    c. Choose the response type as either ‘Text Value’ or ‘Option List’. See below for details on the two options:

    From Text

    This will present the user with a free text input field to respond to the extra information question.

    Option List

    This will require you to configure a list of valid answers to the extra information question.

    When using ‘Option List’, the extra information question must be marked as required.

    ‘Option List’ options can be added and removed once ‘Option List’ has been chosen from the drop down.

Note

Don’t forget that the total condition factor score weights must add up to 100%. Throughout the function definition, any errors will be highlighted for you to keep track of.

  1. Once complete, simply click ‘Save Function’ to commit the new function.

Editing Existing Condition Functions

As your organisation’s Asset Maturity evolves over time, it may become necessary to alter your condition functions to reflect additional or revised data scopes. Typically, this involves adjusting some condition factor scores/weights, more or less condition factors, and/or adjusting extra field definitions. To edit an existing condition function, follow these steps:

  1. Navigate to the desired Condition Function (Assets Menu > Condition Functions > Selected Function).

  2. With the desired condition function selected, a preview of the definition will appear on the right-hand side of the page. This view will default to read-only. To begin editing the condition function, click the ‘Edit Function’ button.

  3. Enter the required alterations to the selected condition function.

  4. Once complete, simply click ‘Save Function’ to commit the changes.

Condition Function Attachments

Condition Function attachments are used to provide additional context to a function definition. When mobile application users interface with the condition function, they can view the attachments and download them to their device for offline use. To add an attachment to a condition function, follow these steps:

  1. Navigate to the ‘Condition Function’ management page (Assets Menu > Condition Functions).
  2. With the condition function you wish to attach to selected, simple click on the ‘Add Attachments’ button at the top of the preview.
  3. This will open a dialog box where you can upload the attachment. Supported file types include images, PDFs, and other common document formats.
  4. Please note, that there is also the option to link to an existing attachment. This is useful when the attachment is already stored in the system, and you wish to link/share it with another condition function.
  5. Once the attachment is uploaded, it will be displayed in the condition function preview. You can add multiple attachments to a single condition function.

Assigning Condition Functions to Classifications

Once a condition function has been constructed, you can assign it to a specific classification (or a set of classifications) in order to use that function in production when completing condition assessment inspections.

  1. To begin assigning condition functions to a classification or set of classifications, navigate to that function within the Condition Function page (Assets Menu > Condition Functions> Selected Function).

  2. With the desired function selected, a preview of the definition will appear on the right-hand side of the page.

  3. At the top-right of this preview, is an ‘Actions’ menu that provides additional management options for the selected function. Click on the ‘Actions’ menu.

  4. From the ‘Actions’ menu, choose ‘Manage Classification Links’.

  5. A dialog box will appear with lists of available links that could be made. It should be noted that only Component Classification links are valid for Condition Functions.

  6. To assign a function to a classification, simply click ‘Assign’ next to that classification title.

  7. To unassign a function from a classification, simply click ‘Unassign’ next to that classification title.

  8. The system will manage the availability of the above buttons based on the form state in the system.

Using the filter options
  1. When there are a great number of Classification configurations to wade through, it can become difficult to find the one you are after. This is where the filter option comes in handy. To filter the classification list, simply click on the ‘Filter’ icon at the top of the classification list – the icon looks a little like a funnel.

  2. To filter by a specific letter or set of letters, simply type them into the text input that will appear above the classification list.

  3. To filter by classifications that already have the function assigned, mark the checkbox titled ‘Show Assigned Only’.

Deleting Condition Functions

When a condition function is no longer required, the Metrix Asset Management system provides functionality for administrators to permanently remove it from the system.

Warning

Deleting condition functions cannot be undone. The following restrictions also apply when it comes to deleting condition functions:

  • Condition function cannot be in use: If the condition function is currently assigned to any component within the system, regardless of status, then it cannot be deleted. That is, if a condition assessment has been conducted using the condition function definition, then it cannot be removed.

To delete a condition function, follow these steps:

  1. To begin deleting a condition function, navigate to that function (Assets Menu > Condition functions > Selected Condition function).

  2. Underneath the condition function title, there is an ‘Actions’ button – this type of button is implemented system wide as an indicator of additional options to manage a resource.

  3. From the ‘Actions’ menu, choose ‘Delete’. If the button is not enabled, this means that the function cannot be deleted (see warning notes, above).

  4. In the subsequent dialog, confirm your decision by clicking ‘Delete’.

  5. The condition function will now be permanently deleted from the system.

Report Categories (Tags)

Report Categories, sometimes referred to as Tags, in the Metrix Asset Management System provide the ability for users to apply custom levels of organisation to their asset portfolio. The following sections provide instruction on you can create your own report categories within the Metrix Asset Management System.

Subsections of Report Categories (Tags)

About

This section contains basic information about report category definitions in the Metrix Asset Management system.

Subsections of About

Report Categories

Report Categories, sometimes referred to as Tags, in the Metrix Asset Management System provide the ability for users to apply custom levels of organisation to their asset portfolio. This has proven to be very useful for grouping otherwise unrelated assets and components together for specific reporting purposes.

A report categories is simply a custom category, set by your administrators, with pre-defined category options, also configured by your administrators.

Example

A classic example of a report category is a ‘Responsible Officer’ report category for ‘Airport’ assets. At an airport, there are many different asset classifications ranging from water/sewer infrastructure, transportation assets, as well as the airport specific items. All of these pieces of infrastructure could have different asset/component classifications that span different asset classes. A report category of ‘Responsible Officer - Airport Manager’ would allow you to group them together for specific reporting purposes.

Report Category ID

Using the correct ID is important when accessing Metrix via APIs or using CSV file imports. The following details the ID values that can be used for report category references.

Report Category & Option ID

The report category ID is the only way to make a valid reference to a report category & option combination from external locations such as API calls or CSV Data Imports. Once a report category has been created, the ID value (which will remain constant regardless of alterations) can be found in the report category preview table in the ‘Code’ column.

How To Guides

This section contains how to guides with respect to report category definitions in the Metrix Asset Management system.

Subsections of How To Guides

Creating Report Categories

This section covers the necessary steps involved in creating a new report category within the Metrix Asset Management System. This extends to the initial creation of the category, as well as populating the category options for it.

To create a new report category within Metrix, complete the following steps:

  1. Navigate to the ‘Report Categories’ management page (Assets Menu > Report Categories).

  2. Click on ‘Create New Report Category’ at the top of the page.

  3. This will initialise and display a blank report category definition in a new dialog window.

  4. Set the new ‘Category Name’ by entering it into the text input.

  5. Set the label for the first ‘Category Option’ for the report category by typing it into the corresponding option input.

  6. To add additional ‘Category Options’ simply click on the plus (’+’) symbol next to one of the existing options.

  7. To remove a ‘Category Option’ simply click the remove (’-’) symbol next to the corresponding option.

Info

Each report category definition must have at least one (1) report category option assigned to it. This is why the first option in each set of report category definitions does not have a remove option.

  1. When you have finished defining the report category, click ‘Create’.

Edit Existing Report Categories

As your organisation evolves over time, it may become necessary to alter your report category definitions to reflect additional or revised category options. Typically, this involves adding and/or removing category options. To edit an existing report category definition set, follow these steps:

  1. Navigate to the desired Report Category (Assets Menu > Report Categories > Selected Category).

  2. With the desired report category selected, a preview of the definition will appear on the right-hand side of the page. This is a read-only overview of the selected report category.

  3. To remove a report category option, simply click on the trash can icon to the right of the option entry. If this icon is muted, it means that the option is currently assigned to an asset component and cannot be removed.

  4. To add a new option to the category definition, click on ‘Create New Option for Current Category’ at the top of the category definition. A new dialog will appear, enter the label of the new option and click ‘Create’.

Note

Renaming category titles or category option labels is currently NOT supported.

Deleting Report Categories

When a report category is no longer required, the Metrix Asset Management system provides functionality for administrators to permanently remove it from the system.

Warning

Deleting report categories cannot be undone. The following restrictions also apply when it comes to deleting forms:

  • Report category cannot be in use: If the report category is currently assigned to any component, regardless of status, then it cannot be deleted.

To delete a report category (including all of it’s options), follow these steps:

  1. To begin deleting a report category, navigate to that report category (Assets Menu > Report Categories > Selected Category).

  2. Underneath the category title, there is an ‘Actions’ button – this type of button is implemented system wide as an indicator of additional options to manage a resource.

  3. From the ‘Actions’ menu, choose ‘Delete Report Category’. If the button is not enabled, this means that the category cannot be deleted (see warning notes, above).

  4. In the subsequent dialog, confirm your decision by clicking ‘Delete’.

  5. The report category will now be permanently deleted from the system.

Status Codes

Status Codes, in the Metrix Asset Management System provide the ability for users to apply customised life-stage tags to their asset portfolio. Such associations can assist with triaging assets through various phases of life including proposed assets, active assets and inactive assets.

Subsections of Status Codes

About

This section contains basic information about status code definitions in the Metrix Asset Management system.

Subsections of About

Status Code Effect

Within the system, the above phases are referred to as ‘Status Effects’. These are predefined codes that impact the behaviour of status codes of each type. A status code’s effect cannot be modified after initial creation. Following is a description of each built-in status effect:

Proposed:

Assets that have not yet been commissioned, but are included in the asset portfolio for information and data tracking. Assets at with status codes of this type cannot have financial ledger transactions logged against them.

Active:

Assets that form part of the normal asset portfolio.

Inactive:

Assets that are no longer part of the asset portfolio. These assets typically represent those that have been fully disposed and/or removed from service. Assets at with status codes of this type cannot have financial ledger transactions logged against them.

Status Code IDs

Using the correct ID is important when accessing Metrix via APIs or using CSV file imports. The following details the ID values that can be used for status code references.

Status Code ID

The status code ID is the only way to make a valid reference to a status code from external locations such as API calls or CSV Data Imports. Once a status code has been created, the ID value (which will remain constant regardless of alterations) can be found in the ‘Code’ column of the status configurations table.

How To Guides

This section contains how to guides with respect to status code definitions in the Metrix Asset Management system.

Subsections of How To Guides

Creating Status Codes

This section covers the necessary steps involved in creating a new status code within the Metrix Asset Management System. This extends to the initial creation of the code with status effect. In subsequent sections, editing and deleting status codes is discussed.

To create a new status code within Metrix, complete the following steps:

  1. Navigate to the ‘Status Codes’ management page (Assets Menu > Status Codes).

  2. Click on ‘Create New Status Code’ at the top of the page.

  3. This will initialise a new status code and display a dialog box waiting for additional details.

  4. From here, you will need to set the ‘Status Name’, the ‘Status Effect’ (see Status Codes), and a brief ‘Description’ for the new status code.

  5. When you have finished defining the status code, click ‘Create’

Note

Editing a status code is restricted to updating the description only. Other properties including the status label and the status effect cannot be modified after initial creation.

Editing Status Codes

In the Metrix Asset Management system, editing a status code is restricted to updating the description only. Other properties including the status label and the status effect cannot be modified after initial creation.

To edit the description of a status code, complete the following steps:

  1. Navigate to the ‘Status Codes’ management page (Assets Menu > Status Codes).

  2. This page renders every status code currently configured in the system. To edit a particular status code description, click on the pencil ‘Edit’ icon on the right-hand side of the description field in the corresponding row.

  3. Once finished, click on the tick icon at the right-end of the input box.

Deleting Status Codes

When a status code is no longer required, the Metrix Asset Management system provides functionality for administrators to permanently remove it from the system.

Warning

Deleting status codes cannot be undone. The following restrictions also apply when it comes to deleting status codes:

  • Status codes cannot be in use: If the status code is currently assigned to any component within the system, then it cannot be deleted.

To delete a status code, follow these steps:

  1. To begin deleting a status code, navigate to the ‘Status Codes’ management page (Assets Menu > Status Codes).

  2. This page renders every status code currently configured in the system. To delete a particular status code, click the trash-can ‘Delete’ icon at the far right-hand side of the row. If the button is not enabled, this means that the status code cannot be deleted (see warning notes, above).

  3. In the subsequent dialog, confirm your decision by clicking ‘Delete’.

  4. The status code will now be permanently deleted from the system.

Finance Ledger Codes

Finance Ledger Codes in the Metrix Asset Management System provide the ability for users to construct custom reporting states for the financial transaction ledger. In this, there are two key code types that can be set to structure an organisations end of period financial reporting - Finance Categories, and Transaction Types.

Subsections of Finance Ledger Codes

About

This section contains basic information about financial settings in the Metrix Asset Management system.

Subsections of About

Finance Categories

The finance category is the principle categorisation field for the Financial Movement Report - the key input tool for an organisations ‘Infrastructure, Property, Plant, and Equipment’ statement. Typically, organisations will configure one finance category within Metrix for each desired reporting row within this end of period statement.

In practice, an asset components finance category is assigned via the first financial transaction ledger entry made against it. Each subsequent transaction, posted against that component, will inherit that finance category. To change a components finance category, a ‘Reclassification’ process must occur which will write-off the gross and accumulated depreciation value from the component under the ‘old’ category, and then write both back on against the ’new’ category (no value is created or lost, but the finance category will be changed).
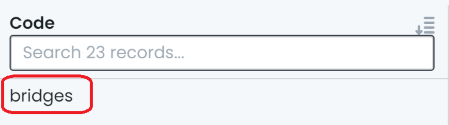
Finance Category ID

The finance category ID is the only way to make a valid reference to a finance category from external locations such as API calls or CSV Data Imports. Once a finance category has been created, the ID value (which will remain constant regardless of alterations) can be found in the ‘Code’ column of the finance category preview table.

Transaction Types

The transaction type is designed to inform the financial transaction ledger on the type of financial movement that the entry represents. Built-in transaction types include ‘Recognition’, ‘Renewal’, ‘Addition’, etc.

Example

During a reporting period, an asset component may have six (6) renewal transactions, two (2) depreciation transactions, and one (1) upgrade transaction posted against it. The end of period report (the Temporal Finance Report) will sum the six (6) renewal postings, the two (2) depreciation postings, and the one (1) upgrade postings as the summary of movements for that component during the reporting period.

Transaction Type Effects

Each transaction type is assigned to a transaction type effect of ‘Gross’ and/or ‘Accumulated Depreciation’. When the Temporal Finance Report is generated, the movement results are summed into these transaction type allotments.

Restrictions can be applied to transaction type posting values such as ‘Positive Values’ only, or, ‘Negative Values’ only. This can assist with controlling end user input around expected movement behaviour in terms of capital value. For example, the built-in depreciation transaction type has a restriction of ‘Negative Values’ only because depreciation is always and only ever a decrement to an asset components carrying value.

Transaction Type ID

The transaction type ID is the only way to make a valid reference to a transaction type from external locations such as API calls or CSV Data Imports. Once a transaction type has been created, the ID value (which will remain constant regardless of alterations) can be found in the ‘Code’ column of the transaction type preview table.

How To Guides

This section contains how to guides with respect to financial settings in the Metrix Asset Management system.

Subsections of How To Guides

Creating Finance Categories

This section covers the necessary steps involved in creating a new finance category within the Metrix Asset Management System. This extends to the initial creation of the category along with a description. In subsequent sections, editing and deleting finance categories is discussed.

To create a new finance category within Metrix, complete the following steps:

  1. Navigate to the ‘Finance Categories’ management page (Assets Menu > Finance Categories).

  2. Click on ‘Create New Finance Category’ at the top of the page.

  3. This will initialise a new finance category and display a dialog box waiting for additional details.

  4. From here, you will need to set the ‘Finance Category Name’, and an optional ‘Description’ for the new category.

  5. When you have finished defining the finance category, click ‘Create’

Note

Editing a finance category is restricted to updating the description only. Other properties including the category name cannot be modified after initial creation.

Editing Finance Categories

In the Metrix Asset Management system, editing a finance category is restricted to updating the description only. Other properties including the category name cannot be modified after initial creation.

To edit the description of a finance category, complete the following steps:

  1. Navigate to the ‘Finance Categories’ management page (Assets Menu > Finance Categories).

  2. This page renders every finance category currently configured in the system. To edit a particular finance category description, click on the pencil ‘Edit’ icon on the right-hand side of the description field in the corresponding row.

  3. Once finished, click on the tick icon at the right-end of the input box.

Deleting Finance Categories

When a finance category is no longer required, the Metrix Asset Management system provides functionality for administrators to permanently remove it from the system.

Warning

Deleting finance categories cannot be undone. The following restrictions also apply when it comes to deleting finance categories:

  • Finance categories cannot be in use: If the finance category is currently assigned to any component via a posted transaction within the system, then it cannot be deleted.

To delete a finance category, follow these steps:

  1. To begin deleting a finance category, navigate to the ‘Finance Categories’ management page (Assets Menu > Finance Categories).

  2. This page renders every finance category currently configured in the system. To delete a particular finance category, click the trash-can ‘Delete’ icon at the far right-hand side of the row. If the button is not enabled, this means that the finance category cannot be deleted (see warning notes, above).

  3. In the subsequent dialog, confirm your decision by clicking ‘Delete’.

  4. The finance category will now be permanently deleted from the system.

Creating Transaction Types

This section covers the necessary steps involved in creating a new transaction type within the Metrix Asset Management System. This extends to the initial creation of the type along with the type effect, and any value restrictions that may apply. In subsequent sections, editing and deleting transaction types is discussed.

To create a new transaction type within Metrix, complete the following steps:

  1. Navigate to the ‘Transaction Types’ management page (Assets Menu > Transaction Types).

  2. Click on ‘Create New Transaction Types’ at the top of the page.

  3. This will initialise a new transaction type and display a dialog box waiting for additional details.

  4. From here, you will need to set the ‘Transaction Type Name’, the ‘Transaction Type Effect’, and the ‘Transaction Type Value Direction’ for the new type. See Finance Ledger Codes.

  5. When you have finished defining the transaction type, click ‘Create’

Note

Editing a transaction type is restricted to updating the value restriction only. Other properties including the name cannot be modified after initial creation.

Editing Transaction Types

In the Metrix Asset Management system, editing a transaction type is restricted to updating the value restriction only. Other properties including the name cannot be modified after initial creation.

To edit the value direction restriction on a transaction type, complete the following steps:

  1. Navigate to the ‘Transaction Type’ management page (Assets Menu > Transaction Types).

  2. This page renders every transaction type currently configured in the system. To edit a particular transaction type value restriction, click on the pencil ‘Edit’ icon on the right-hand side of the ‘Direction’ field in the corresponding row.

  3. Set the new transaction type value restriction to either ‘Negative Only’, ‘Positive Only’, or ‘Any’.

  4. Once finished, click on the tick icon at the right-end of the input box.

Deleting Transaction Types

When a transaction type is no longer required, the Metrix Asset Management system provides functionality for administrators to permanently remove it from the system.

Warning

Deleting transaction types cannot be undone. The following restrictions also apply when it comes to deleting transaction types:

  • Transaction type cannot be in use: If the transaction type is currently assigned to any component via a posted transaction within the system, then it cannot be deleted.

  • Built-in transaction types cannot be deleted: The system comes pre-seeded with a number of transaction types. These cannot be deleted.

To delete a transaction type, follow these steps:

  1. To begin deleting a transaction type, navigate to the ‘Transaction Type’ management page (Assets Menu > Transaction Types).

  2. This page renders every transaction type currently configured in the system. To delete a particular transaction type, click the trash-can ‘Delete’ icon at the far right-hand side of the row. If the button is not enabled, this means that the transaction type cannot be deleted (see warning notes, above).

  3. In the subsequent dialog, confirm your decision by clicking ‘Delete’.

  4. The transaction type will now be permanently deleted from the system.

Classification Resource Configuration

In addition to linking resources for use throughout an asset portfolio, the classification configuration screen allows you to set other properties that control the behaviour of assets and their components throughout the Metrix Asset Management system.

This includes setting resources for both:

  • Asset level classifications, and
  • Component group level classifications.

Subsections of Classification Resource Configuration

About

This section contains basic information about classification configurations in the Metrix Asset Management system.

Subsections of About

Component Flags

Component flags are simple ways to toggle the expected requirements of a component group. Such flags include:

Conditioned:

The conditioned flag indicates if components assigned to the relative component group will typically require condition assessments to be conducted. Setting this flag to ‘off’ will mean that any assigned components do not contribute to any ‘missing condition’ counts or filters.

Depreciable:

The depreciable flag indicates if components assigned to the relative component group will typically require periodic depreciation charged against its carrying value. This can be useful for report generation as well as tracking the state of the organisations depreciation runs.

Carries value:

The carries value flag indicates if components assigned to the relative component group will typically be posted against in the financial transaction ledger. This would be set to ‘off’ for non-valued assets that are included for reference or other reasons.

Smart Attributes

Smart attributes can be defined to link an asset components attribute to the underlying spatial feature, and setting its value to the length or area of said geometry. Once an attribute has been defined as a smart attribute for a given classification, its value can no longer be set by end users. Rather, any changes to the underlying spatial feature will trigger an update of the fields value.

In order to be defined as a smart attribute, the form field must be marked as required.

Info

The definition of a smart attribute, like cost unit formulas, must be done via the classification screen. This is because form definitions can be shared across multiple classifications, and it may not be correct for an attribute to be ‘smart’ for all of the classifications that rely upon it.

Cost Unit Formulas

Cost unit formulas can be defined to calculate an asset components cost unit value according to a user defined algorithm based on the underlying attribute form and/or any defined smart attributes. When a cost unit formula is defined and in force, end users will be unable to manually set the ‘Cost Units’ value for asset components within that component group.

Example

Consider the Surface component of a Local Road asset. The Intervention Treatment assigned to the component may have a Unit Rate that is based in square metres. Therefore, the units of measure for the component Cost Units would also need to be in square metres. This Cost Unit value can be set automatically by a Cost Unit Formula result.

Firstly, the organisation would need to define an attribute form with at least the following two (2) fields:

  • Length: as a required, numeric field (possibly a smart attribute linked to a line length)
  • Width: as a required, numeric field

With the attribute form assigned to the Road Surface component group, the organisation would then define the following Cost Unit Formula:

[Length] x [Width]

Assigning this formula as the component group’s Cost Unit Formula would then cause any assigned components to have an automatically calculated Cost Unit field that will react to changes to the Length and/or Width attributes.

Classification Resources

In addition to linking resources for use throughout an asset portfolio, the classification configuration screen allows you to set other properties that control the behaviour of assets and their components throughout the Metrix Asset Management system.

This includes setting resources for both:

  • Asset level classifications, and
  • Component group level classifications.

All classification linked resources can be managed from the classification configuration screen (in addition to the link portals on the resource management page). This includes the following resource types:

Asset Level Resources

Component Level Resources

How To Guides

This section contains how to guides with respect to classification configurations in the Metrix Asset Management system.

Subsections of How To Guides

Define Cost Unit Formula

This section covers the necessary steps involved in creating a new cost unit formula for a given classification within the Metrix Asset Management System.

Prerequisites

In order to set a Cost Unit Formula, the following prerequisites must be met:

  • The component classification must have a valid attribute form assigned to it. See Form Management or Classification Resource Management for more information.

  • The assigned form specification must contain at least one (1) field matching the following attribute definition:

    • Data Type: Decimal Number
    • Required: True

    See Form Management for more information

To create a new cost unit formula definition within Metrix, complete the following steps:

  1. Navigate to the component group within the asset classification using the ‘Classifications’ page. (Assets Menu > Classifications > Selected Classification > Selected Component Group).

  2. Click on ‘Edit Configuration’ to enter allow editing the classification definition.

  3. This will convert the view to an editing mode with some additional options. Make sure you have the desired component group selected before continuing.

  4. Within the ‘Data’ section, click on the drop down menu under ‘Cost Units Formula’.

    Note

    If this is not available, it means that a valid form definition does not exist for setting smart attribute definitions.

  5. To define a NEW cost unit formula, click on the ‘New Cost Unit Formula’ option in the drop down list.

  6. A dialog will appear ready to define the cost unit formula.

  7. First, set the Formula Name by entering it into the input box.

  8. Then, to define a cost unit formula, you will need to build a valid algorithm using:

    • Valid attribute definitions,
    • Fixed numeric values, and/or,
    • Basic mathematical operators.
    Note

    Remember that only attributes matching the prerequisite definitions will be shown.

    Within the ‘Formula Builder’ section is three (3) menu options that allow users to choose the next input or operator for the cost unit formula. As you select inputs/operators, the algorithm expression preview will populate for you.

    To edit or remove a particular input or operator, simply click on that entry in the algorithm expression to see a list of options for edit or removal.

  9. Before you can commit any new or revised cost unit formula, you must test it. This involves providing ‘dummy’ values for any attribute fields in the algorithm. Once the ‘dummy’ values are set, click ‘Evaluate Formula with Test Values’.

  10. The server will evaluate the formula and return a response. Make sure you verify this result yourself before continuing.

  11. Once complete, click ‘Save Formula’.

  12. Important: The cost unit formula has now been defined and is available for use. In order to actually use it for the selected component group, ensure you select it from the ‘Cost Unit Formula’ drop down list.

    Info

    Cost Unit Formula definitions are stored against the underlying form definition (as this is where the input attribute fields are defined). Any component group assigned to a form definition with one or more defined cost unit formulas, can use that formula.

  13. Once you have finished click ‘Save Config Changes’.

Define Smart Attributes

This section covers the necessary steps involved in creating a new smart attribute for a given classification within the Metrix Asset Management System.

Prerequisites

In order to set a Smart Attribute, the following prerequisites must be met:

  • The component classification must have a valid attribute form assigned to it. See Form Management or Classification Resource Management for more information.

  • The assigned form specification must contain at least one (1) field matching the following attribute definition:

    • Data Type: Decimal Number
    • Required: True

    See Form Management for more information

To create a new smart attribute definition within Metrix, complete the following steps:

  1. Navigate to the component group within the asset classification using the ‘Classifications’ page. (Assets Menu > Classifications > Selected Classification > Selected Component Group).

  2. Click on ‘Edit Configuration’ to enter allow editing the classification definition.

  3. This will convert the view to an editing mode with some additional options. Make sure you have the desired component group selected before continuing.

  4. Within the ‘Data’ section, click on ‘Manage Smart Attribute(s)’.

    NOTE: If this is not available, it means that a valid form definition does not exist for setting smart attribute definitions.

  5. A dialog will appear showing all of the configured field definitions that match the prerequisites for smart attributes.

    To set a smart attribute as linked to the underlying spatial feature’s Length, check the corresponding box in the ‘Set by Spatial Length’ column.

    To set a smart attribute as linked to the underlying spatial feature’s area, check the corresponding box in the ‘Set by Spatial Area’ column.

  6. Once you have finished, click ‘Done’. Then, in the main window, click ‘Save Config Changes’.

Bulk Update Smart Attributes & Cost Units

This section covers the necessary steps involved in recalculating and applying the values for smart attribute and cost unit formulas, for a given range of classifications within the Metrix Asset Management System.

Prerequisites

In order to bulk update Smart Attribute and Cost Unit Formulas, the following prerequisites must be met:

To recalculate and apply the values for smart attribute and cost unit formulas within Metrix, for a given range of classifications, complete the following steps:

  1. Navigate to the ‘Classifications’ page. (Assets Menu > Classifications).

  2. Click on ‘Actions’ menu at the top of the Classifications page, and choose ‘Update Smart Attributes and Cost Unit Formulas’ to launch the bulk editing tool.

  3. A dialog will appear and ask you to select the Classifications that you want to roll the update for. Once you have ticked/unticked the relevant Classification(s) to update, select ‘Fetch Components for Classifications’.

  4. The dialog will fetch this information from the server and then advise you of how many components would be affected by the update. Clicking ‘Proceed’, will proceed to update any Smart Attributes and Cost Unit Formulas for the selected components.

Import/Export Classification Configurations

At any time when using the Metrix Asset Management System, users can opt to import and/or export their classification configurations. This can be useful if you are working with a provided training or test environment and wish to migrate configurations between the two.

Exporting Classification Configurations

  1. To get started, navigate to the ‘Export Configurations’ page. (Assets Menu > Export Configuration).

  2. The export system allows users to export resource definitions at one or more of the following levels:

    • Specific Classes: an entire asset class definition. For example: all of the ‘Transportation’ class.
    • Specific Classifications: a single asset classification definition. For example: just the ‘Local Road’ asset group.
  3. Each of the above level selectors will render a different list of available checkboxes to include in the export. That is, if you choose ‘Specific Classes’, you will be presented with a list of checkboxes representing each asset class configured in your system. If you choose ‘Specific Classification’ each asset group will be rendered with a checkbox.

    Simply tick the checkboxes you wish to include in the export.

  4. Then, on the right-hand side, simply confirm which resources you want to include in the export by checking/unchecking resource types.

  5. When ready, click ‘Generate and Download’.

    This will download a .json file that can be used in the following instructions for ‘Importing Classification Configurations’. Make sure you save the file in a location that you can easily access.

Importing Classification Configurations

  1. To get started, navigate to the ‘Import Configurations’ page. (Assets Menu > Import Configuration).

  2. From this page you can either drag and drop a valid configuration file (see above) in to file dropper, or click ‘Select a File to Upload’ to choose a file from your system.

  3. The system will parse the supplied file and validate the classifications and resources included therein. A preview of the found elements will be rendered when ready.

  4. To confirm the import, click ‘Import Found Configurations’.

  5. The imported configurations are now ready to use.

Classification Resource Management

When defining classification resources within the Metrix Asset Management System, users are provided with a means of assigning that new resource to specific asset and/or component classifications. This is very useful for when you are building a particular resource, say an intervention treatment, for one (1) target classification. However, from time to time it may be necessary to manage resource assignments in bulk for a given classification. This guide will instruct you on how to do this in the system.

To begin assigning classification resources from within a classification definition in Metrix, complete the following steps:

  1. Navigate to the desired classification, or the component group within the asset classification, using the ‘Classifications’ page. (Assets Menu > Classifications > Selected Classification > (Selected Component Group)).

  2. Click on ‘Edit Configuration’ to enter allow editing the classification definition.

  3. For asset classification level resources, the following resources can be linked via the configuration screen:

    • Attribute Form: select the desired form definition from the drop down list.

    • Task Types: click on ‘Manage Task Type Link(s)’ and choose the desired task type definitions from the dialog box. When complete, click done.

  4. For component classification level resources, the following resources can be linked via the configuration screen:

    • Component Flags: simply check or uncheck the desired component flags.

    • Attribute Form: select the desired form definition from the drop down list.

      Info

      If any smart attributes or cost unit formulas are linked to the component classification, this option will be disabled.

    • Smart Attributes: see Smart Attributes for details

    • Cost Unit Formula: see Cost Unit Formulas for details

    • Intervention Treatments: click on ‘Manage Treatment Link(s)’ and choose the desired treatment definitions the dialog box. When complete, click done.

    • Condition Functions: select the desired condition function from the drop down list.

    • Task Types: click on ‘Manage Task Type Link(s)’ and choose the desired task type definitions from the dialog box. When complete, click done.

  5. When complete, click ‘Save Config Changes’.