3rd Party Integration

This section provides an overview on the current integration options available to 3rd party applications from the Metrix Asset Management system. Additional integrations are always being developed, and will only be documented once they have been thoroughly tested. If there is a 3rd party platform with which you would like to integrate with your Metrix Asset Management system, please contact support@metrixassets.com. The integrations discussed in this section are:
Subsections of 3rd Party Integration

QGIS Integration

The Metrix Asset Management system QGIS Plugin enables users to swiftly and easily access their Asset Records directly within the QGIS interface. This provides the capacity to:

  • Edit Geometries using QGIS’s powerful editing suite of tools,
  • Create detailed maps with custom styling and layouts,
  • Overlay other user data for custom integrations

Install

Info

QGIS 3.16 or above is required to use this Integration

To install the QGIS Plugin we will use the Plugin Manager to add new plugin repository in order to make sure you can receive the latest plugin versions updates when they are released.

  1. Select ‘Plugins -> Manage and Install plugins..’

  2. Select ‘Settings’

  3. In the ‘Plugin’ Repositories section select ‘Add’

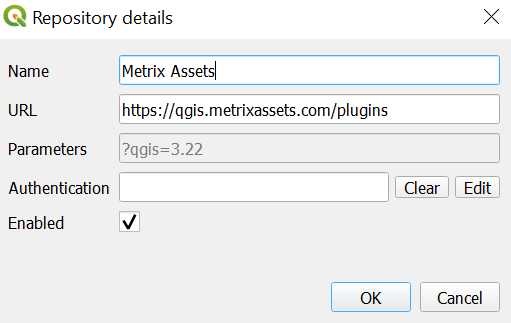
  4. Use the following details

  5. Click ‘Ok’ to add the new repository

You should now have two plugin ‘Plugin Repositories’ shown; the official one and the Metrix Assets one

  1. Select the ‘All’ side menu item to show all available plugins

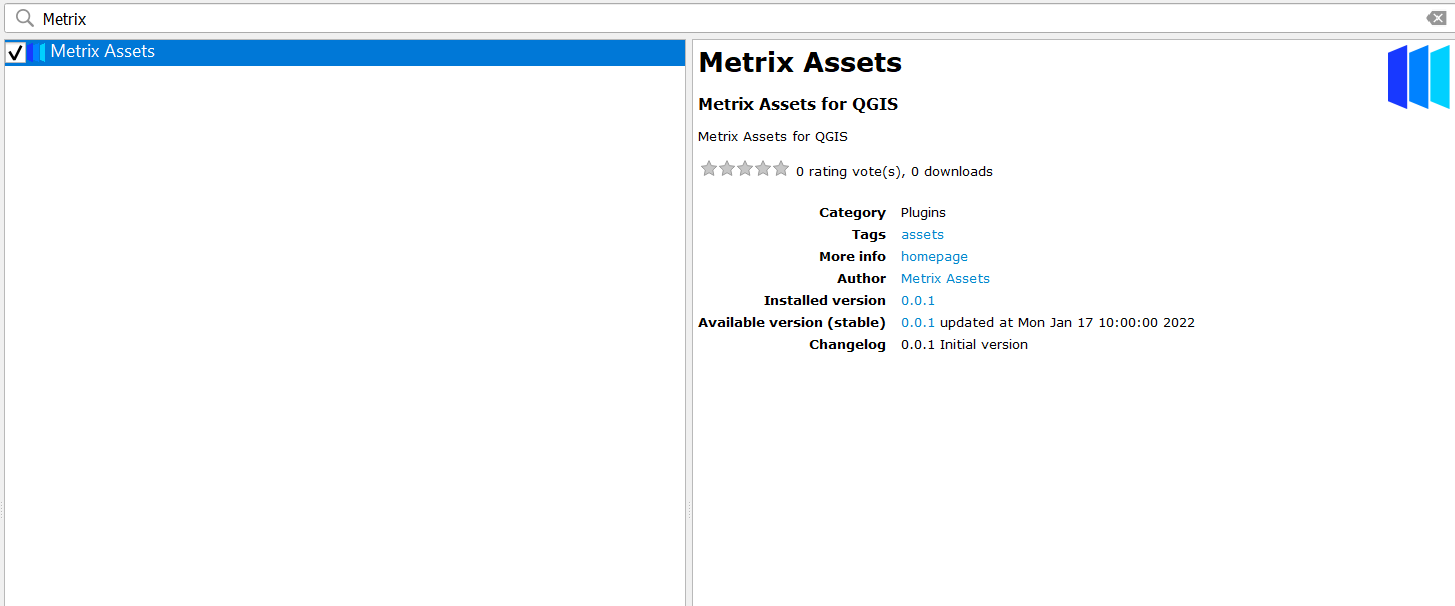
  2. Search for ‘Metrix Assets’ and select ‘Install’

Setting Up a Connection

To begin using the QGIS plugin for Metrix Assets we first have to create a connection to the Cloud Portal. To do this:

  1. Right click on the Metrix Assets node in your QGIS Browser.

  2. Select ‘Connection Settings…’ from the dialogue menu.

    NOTE: These options are also available from the Plugin’s Menu Bar.

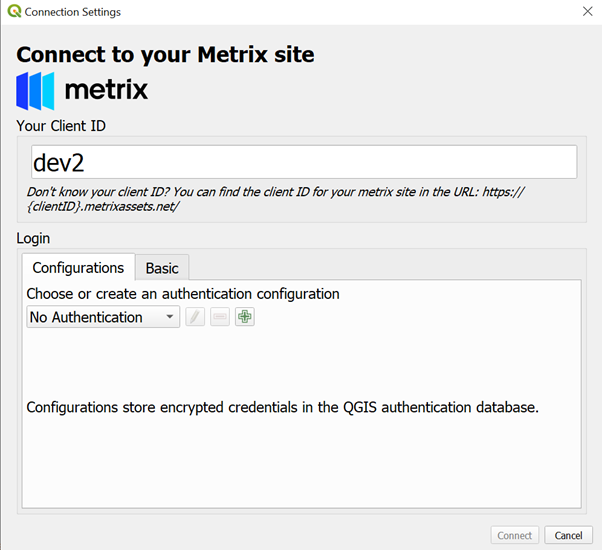
  3. In the resulting dialogue box, set the ‘Client ID’ based on your normal Metrix Assets Portal URL. For example; for a Metrix Assets Portal of http://demo.Metrixassets.com the ‘Client ID’ will be demo.

  4. The next step is to setup the Authentication parameters (username and password).

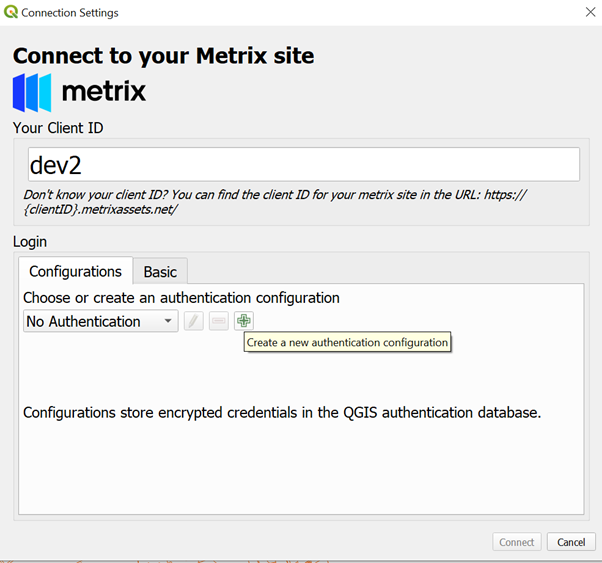
  5. Click the ‘+’ icon to begin adding your Authentication parameters.

    NOTE: QGIS maintains its own secure Authentication Parameter store. If you have never setup Authentication Parameters in QGIS before, you will be prompted for a Master Password that secures and encrypts the Parameter Store on your local machine.

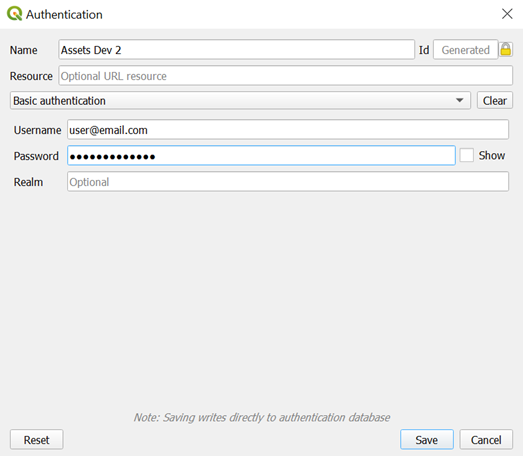
  6. In the resulting dialogue box, set the following:

    • Name: This is simply a name that can be used to edit this Authentication Parameter at a later date - set it to whatever works best.
    • Username: The email address you sign into Metrix Assets with.
    • Password: The password you use to sign into Metrix Assets with.
  7. Click Save once the above parameters are set.

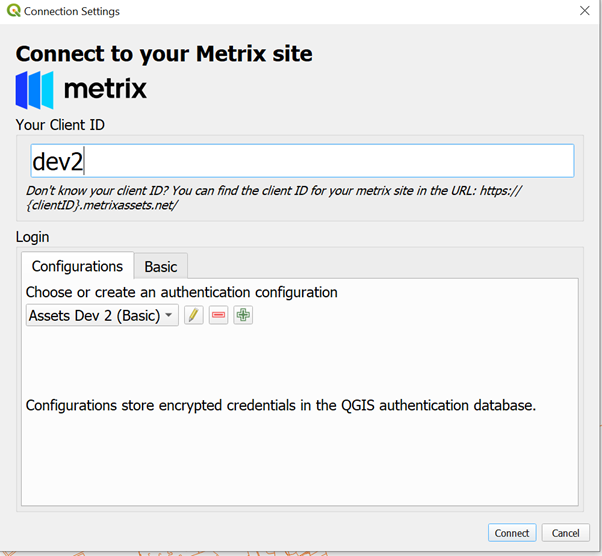
  8. You will be taken back to the ‘Connection Settings’ dialogue box with all the required settings now established. To connect to your data, simply click ‘Connect’ with the Authentication Configuration you defined in the ‘Authentication Configuration’ menu.

Loading Data using the Metrix Assets QGIS Plugin

Once you have setup a connection to your Metrix Assets environment, accessing your available layers can be achieved using the QGIS Browser Panel node ‘Metrix Assets’. To do this:

  1. If not already connected, right click on the ‘Metrix Assets’ node in the QGIS Browser Panel and click ‘Connect’.

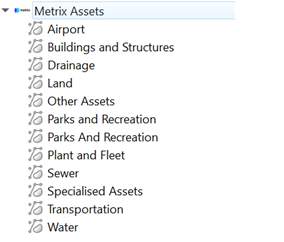
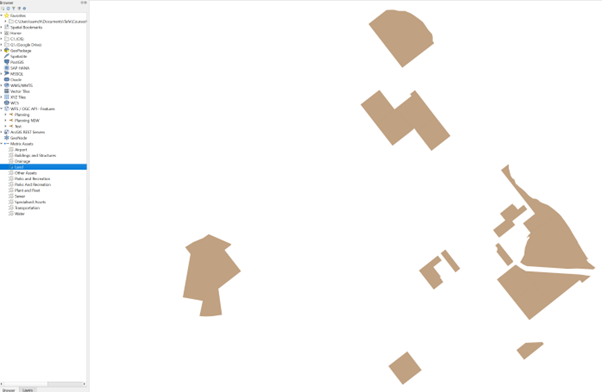
  2. Once connected, expand the ‘Metrix Assets’ node in the QGIS Browser Panel to display the layers available. Each layer is constructed by a complete Asset Class.

  3. To add a layer to the map, simply double-click the layer, or drag it into the map.

  4. From this point, the geometries in the layer can be manipulated just like any other layer in QGIS. That is, to make an alteration to the layer, toggle editing for the layer and process your changes from there, using any native QGIS tools.

    NOTE: Attribute management is NOT currently supported by the tool.

  5. Just like standard QGIS methodology, when you have finished making your alterations, simply toggle editing and Save the changes. At this point, your changes have been saved to a local cache on your local machine.

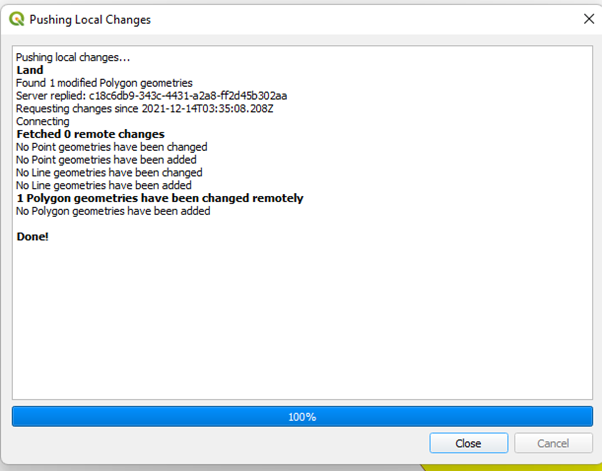
  6. The final step is to synchronise these changes with the Cloud. To do this, navigate to the Plugin’s Menu bar and expand the ‘Synchronise’ sub-menu. From this sub-menu, select ‘Push All Local Changes…’

  7. Your changes will then be processed up to the Cloud and reflected there immediatley.

Using the Panel Interface

The Metrix Assets QGIS Plugin also has support for a Panel interface to view the status of your changes per layer. To use this:

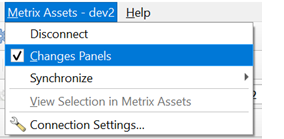
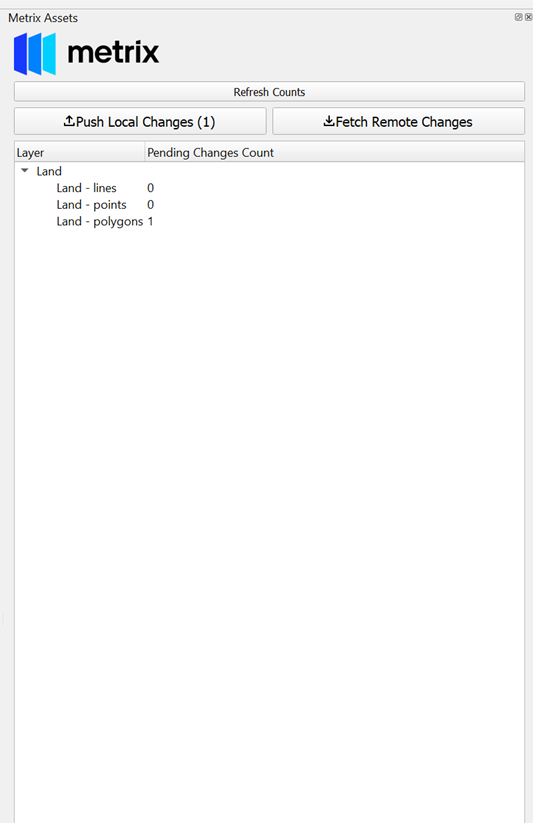
  1. In the Plugin’s menu bar, ensure ‘Status’ is enabled (ticked).

  2. When enabled, you will have access to the Metrix Asset’s control panel which shows the sync status of your changes per layer.

Linking to the Cloud Portal

At any time whilst using the Metrix Assets QGIS Plugin, you can view one or many selected assets in the Cloud Portal with a simple click of a button. To do this:

  1. Select one or many assets in your layer.

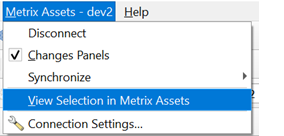
  2. From the Plugin’s menu, select ‘View Selection in Metrix Assets’.

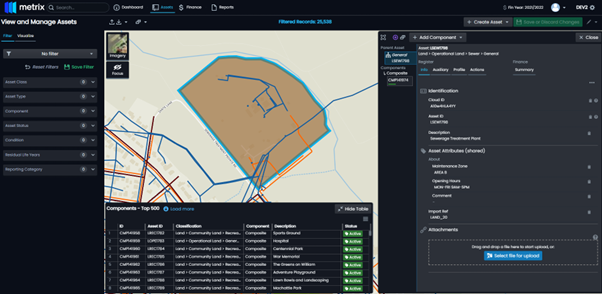
  3. This will open your default Internet Browser and show you the selected asset(s) in the portal.

Metrix Sync

Metrix Sync enables administrators to schedule the download of component data locally (on-premise) into a local database. The local data can then be ingested into 3rd party software such as Intramaps/QGIS for viewing purposes only.

For edit capabilities, refer to the QGIS Plugin.

NB. Users can alternatively manually download Reports that can contain more information than Metrix Sync supports such as conditions/financials/treatments.

Features

  • Able to be scheduled via Task Scheduler
  • Downloads component attribution
  • Built-in Search lookup
  • Security details are encrypted
  • User-defined Database connection parameters
  • User-defined Attributes to download
  • User-defined Search attributes
  • Built-in Metadata
  • Asset-based and component-based views per geometry type
  • Data loads in popular GIS software such as Intramaps/QGIS
  • Support for commonly used database flavors - Microsoft SQL Server
  • Self-updating

Requirements

  • Windows Operating System
  • .NET Framework 4.6.1
  • SQL Server 2014+

Installation

Request a Metrix consultant to roll this out for you. Refer to Metrix Sync Admin.

Example Screenshots

Schedule data to sync to a local SQL Server instance and detect changes made since the last sync.

Setup data in 3rd party software with select, search, layer toggle and integration capabilities

Subsections of Metrix Sync

How To: Implementing Metrix Sync

Download

Download the latest version:

Installation

  • Get an API Key from Metrix -> My Profile -> API Keys
  • Login to SQL Server Management Studio
  • Create an assets_cache database
  • Nominate a SQL Server user that Metrix Sync will use. Ensure that it has read/write/admin/owner permissions to the assets_cache database. If this user is a domain (AD) user, then Task Scheduler will need to Run As this user.
  • Unzip and put on customer network. e.g. \\SERVER_GIS_DIR\Application\Metrix\Metrix_Sync
  • Open the Config.ini in a Text Editor
  • Configure the Database Connection Details
  • Configure the Debug Mode: debug_mode=true
  • Configure the Encryption Mode: mode=encrypt
  • Configure the Apikey: apikey_unencrypted=APIKEY
  • Configure optional parameters
    • api_url=https://api.metrixassets.com/api/v1
      Only useful if the api url changes by the Metrix team.
    • api_attributes=attribute1,attribute2
      A comma delimited list of attributes to download. Refer to Metrix API.
    • search_attributes=attribute1,attribute2
      A comma delimited list of attributes that should be populated in the dbo.cache_lookup_for_search for search reasons. If unset, the ids and description will be searchable.
    • update_mode=true
      Set this to false if there are proxy or IT limitations that prevent the self-updater from functioning.
  • Run Metrix_Sync.exe
  • Copy the encrypted apikey
    Note that if you cannot copy the apikey, right click the top of the cmd window, click Edit and click Mark. You should then be able to interact with the window and highlight the text. Click the ENTER key to copy.
  • Open the Config.ini in a Text Editor
  • Configure the Apikey: apikey=ENCRYPTED_APIKEY
  • Delete the Unencypted APIKey line: apikey_unencrypted=APIKEY
  • Delete the Encryption Mode line: mode=encrypt
  • Run Metrix Sync
  • Check for any errors in the log files
  • Configure the Debug Mode: debug_mode=false
  • Open Task Scheduler
  • Create a new scheduled task to run nightly (or weekly) using the user defined above or a service account.

Implementation into Intramaps (Optional)

  • In Intramaps MapManager, create a map file called Assets (preferably) or if such exists, call it Infrastructure
  • Setup 3 live SQL Server layers to the assets_cache.dbo.*_vw views in MM
    Note: Ensure all three are setup. If you get errors due to empty views, set them up in the MM text
  • Call the layers:
    Metrix Point
    Metrix Line
    Metrix Polygon
  • Setup classes per layer that are based on the theme_name (if it exists) or classification.
    Note: You can get a distinct list of required themes via:
  • Setup an Other class per layer.
  • Setup 3 Tables in the Spatial tab of Intramaps ConfigManager pointing to the 3 component views
  • Setup 3 Selection Layers in the Spatial tab whose mapkey is the component_record_id and whose names are:
    Metrix Polygon SQL
    Metrix Line SQL
    Metrix Point SQL
  • Setup the following Info1 whose name is Info in all 3 Selection Layers. Ensure you change the URL!
  • For IM 9.10 and onwards, remove the following: +’|Click here'
  • Setup a new Database in the Databases tab called SQL (Assets MultiLayer) pointing to one of the 3 selection layers
  • Setup a new Auto-Complete Combobox query named Assets Descr AUTO
  • Setup a Multi-layer search named Metrix Asset with 1 field whose name is @keyword and whose Label is Asset with a width of 50 pointing to the above combobox

How to Purge Metrix Sync Data

  • Rename the cache_metadata to cache_metadata_backup
  • Rename the cache_metadata_backup PK from PK_cache_metadata to PK_cache_metadata_backup
  • Rename the cache_metadata_backup constraint from DF_cache_metadata_last_processed to DF_cache_metadata_backup_last_processed
  • Run Metrix Sync
  • Restore the backed up cache_metadata by deleting the newly created cache_metadata, renaming the backed up one and renaming it’s PK back to PK_cache_metadata and constraint back to DF_cache_metadata_last_processed