Subsections of About
What is a Bucket
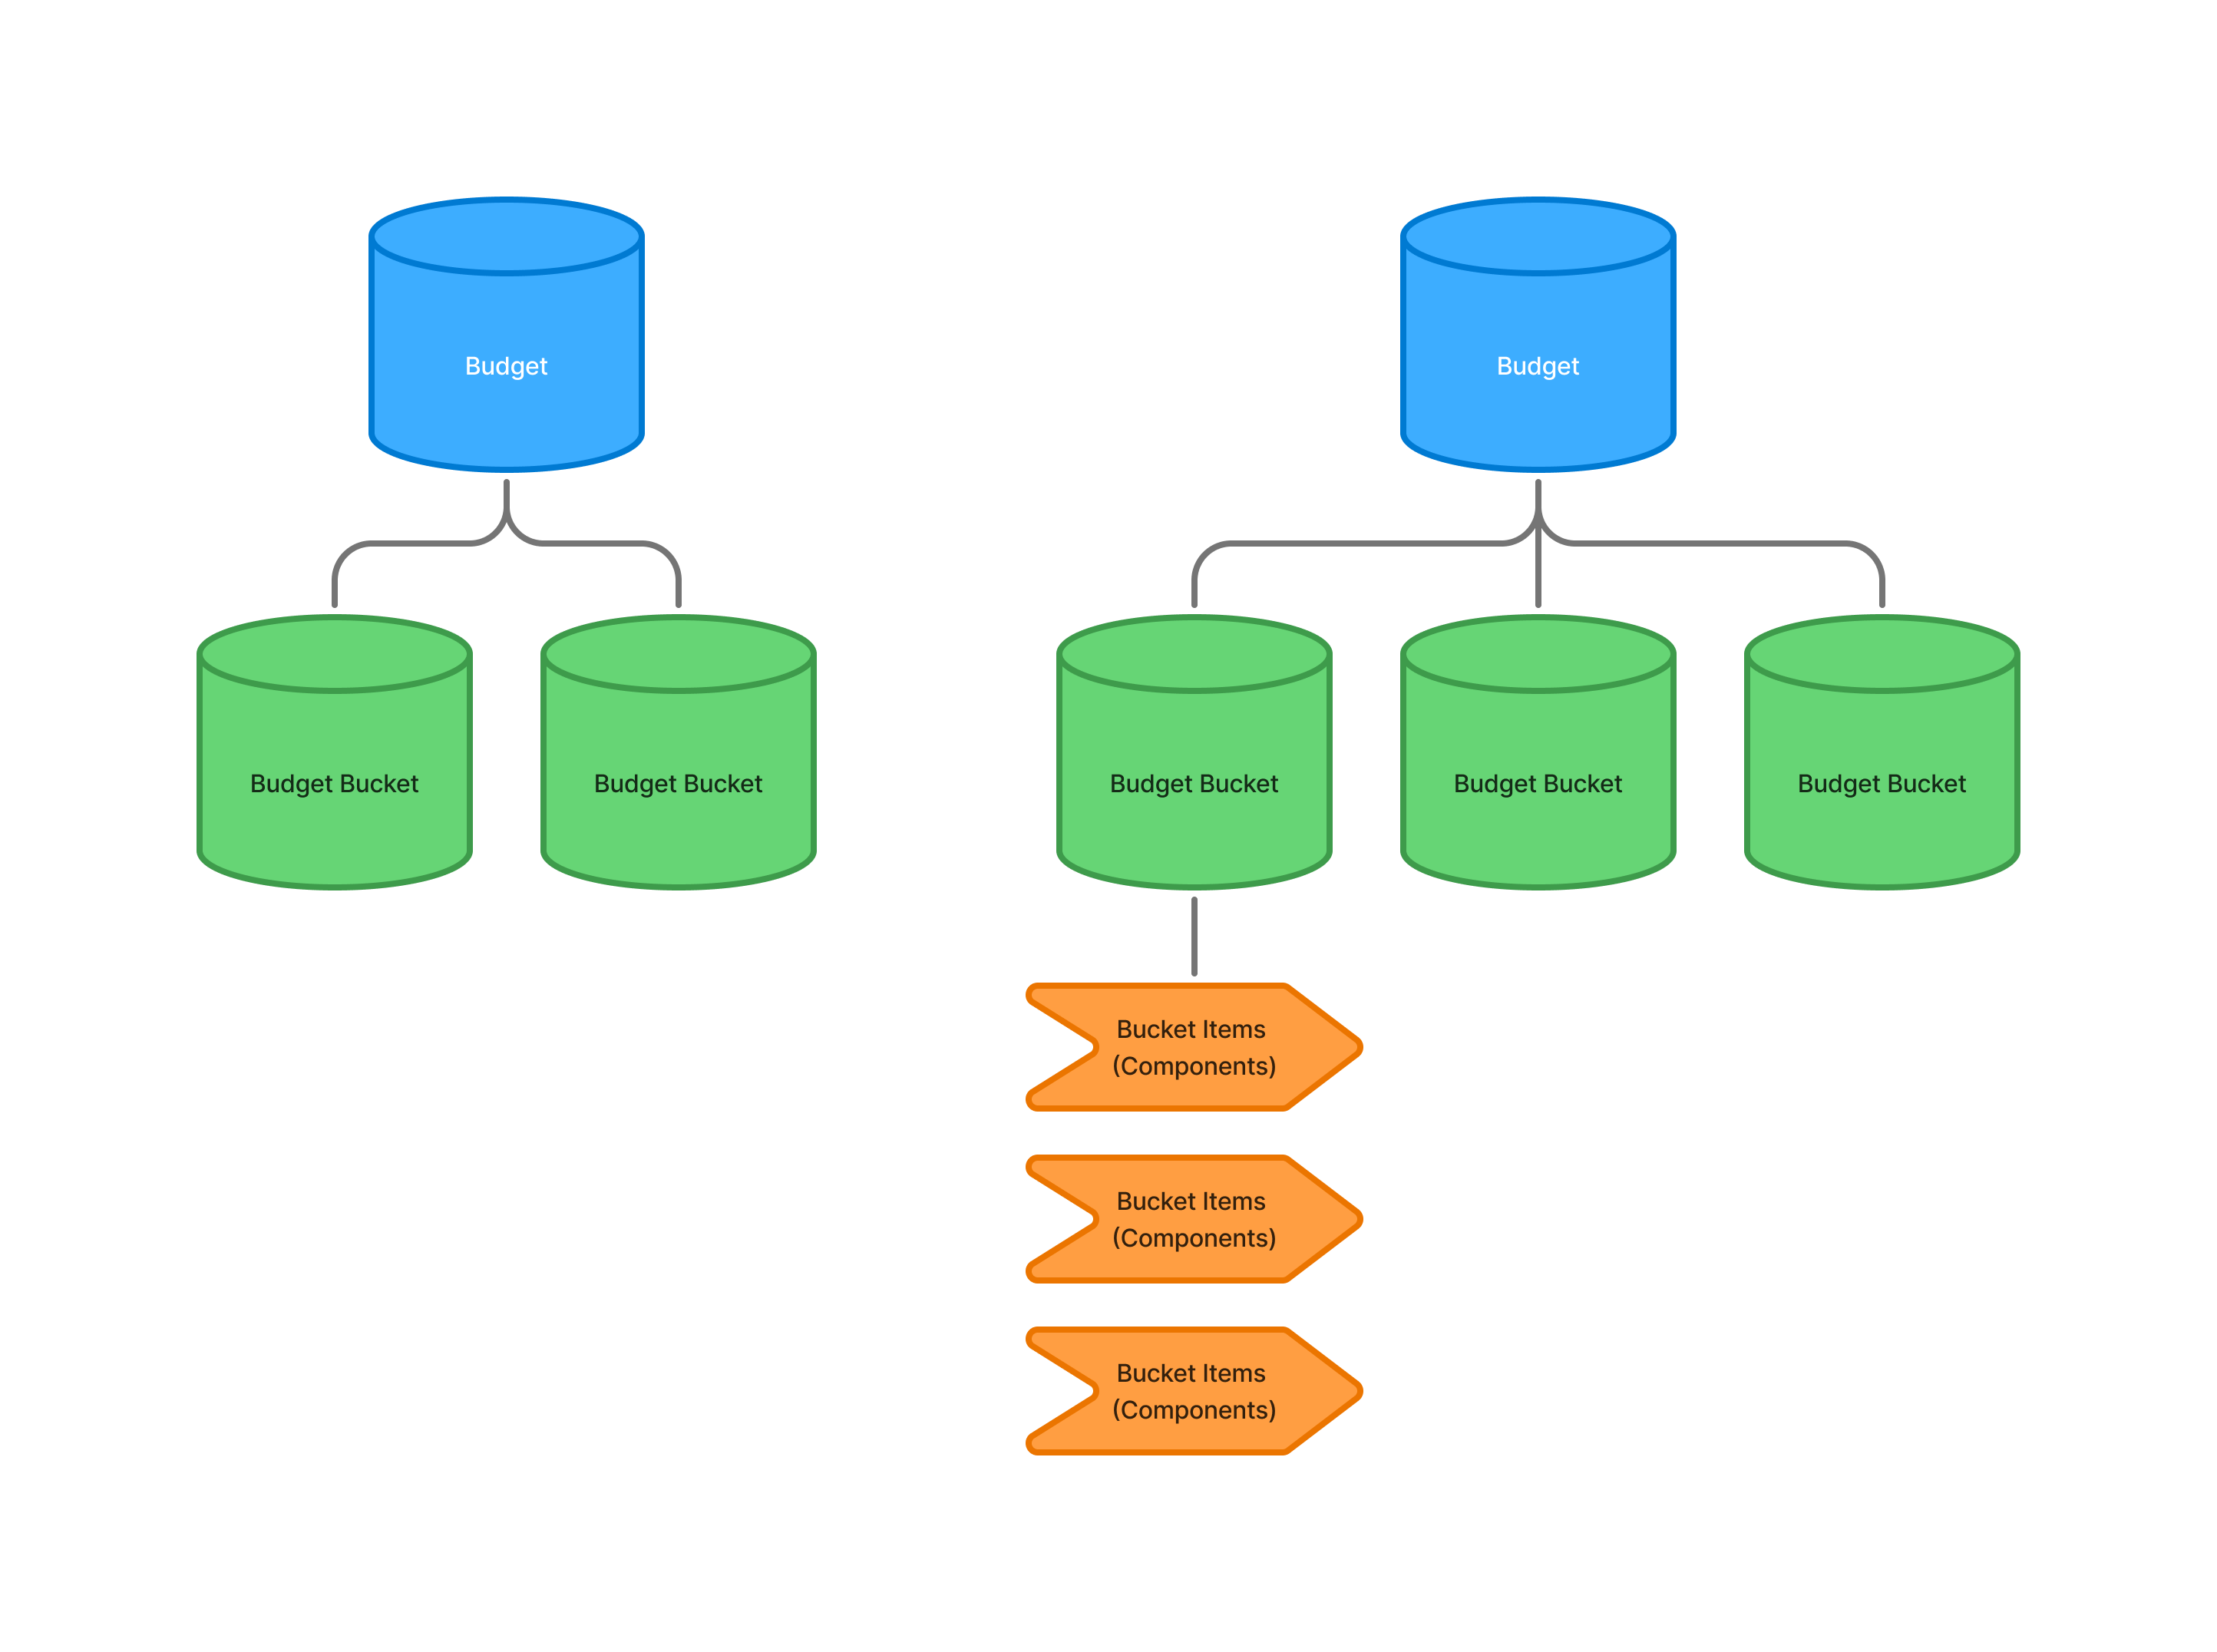
Within the Metrix Asset Management system, a Budget Bucket is the key working unit for managing groups of budgeted
items. A budget bucket can be likened to the idea of a Capital Project. Examples include the annual reseals program,
installation of a new traffic signal, or a new footpath program.
A single Budget can have one or more budget buckets. Each bucket manages their assigned items independently of each other.
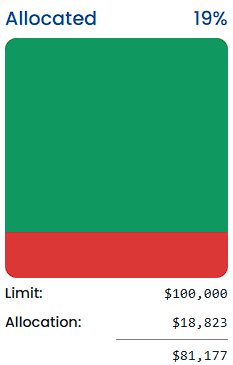
What is the Bucket Limit
The bucket limit is the maximum amount of money that should be spent within a bucket. This limit is set by the user and
can be adjusted at any time. The bucket limit is important because it helps to ensure that assignments of work to the
bucket are not exceeding the expected cost of the project. In fact, when assigning items to a budget bucket, the Allocation
Tracker will compare the current amount in the bucket to the limit.
By setting a limit, users can avoid over-funding a bucket and can ensure that their money is being allocated to the right places.
Bucket Descriptors
Each budget bucket can have three (3) separate descriptor values, including:
- Description - a short description of the bucket
- External Ref - an external reference to the bucket
- Comment - a comment about the bucket
There are no restrictions to the use of these fields, but they are intended to be used as follows:
- Description - a short description of the bucket, such as “Marketing” or “Travel”
- External Ref - an external reference to the bucket, such as a project code or work order number
- Comment - a comment about the bucket, such as “This is a test bucket” or “This is a long term bucket”
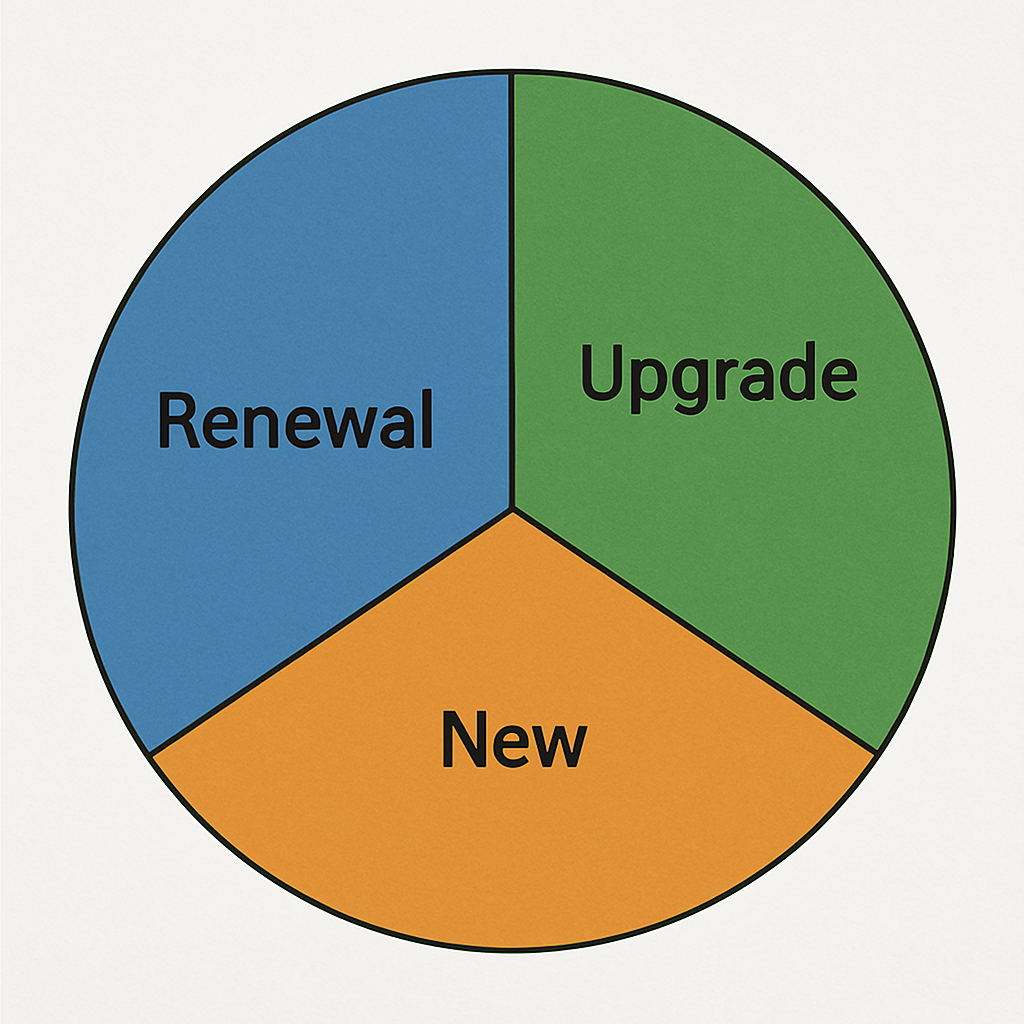
Capitalisation Shares
Each budget bucket can be controlled with optional capitalisation share settings. The capitalisation shares refer to:
- Renewal - works that improve the condition of the asset
- New - works that result in a new asset
- Upgrade - works that expand the capacity of the asset
When you specify capitalisation shares on a budget bucket, you are controlling how any capital expenditures within the
bucket are capitalised against the underlying components. For example:
- If you specify 100% renewal, then all capital expenditures within the bucket will be capitalised as renewals of the
underlying components.
- If you specify 100% new, then all capital expenditures within the bucket will be capitalised as new assets.
A single bucket can have multiple capitalisation shares. For example, you can have a bucket with 50% renewal and 50% upgrade.
In this case, all capital expenditures within the bucket will be split 50% to renewals and 50% to the improvement of capacity of
the same assets.
The total percentage share across the three (3) categories must equal 100%. For example, a project that is 50% Renewal,
and 30% Upgrade, must be 20% New; or else have additional weighting directed towards Renewal or Upgrade. In most cases,
the Capitalisation Shares will be set to 100% for a single category (such as 100% New), and not split across two or three
categories.
Bucket Allocations
A budget bucket’s allocation refers to the calculated cost of works associated with all the component items
assigned to the bucket. As you add component items to a bucket, the allocation will be updated to reflect the total cost
of all items in the bucket.
The calculated cost of work is based upon the component’s selected budgeted method. See
Budgeted Treatment Methods for more information
Bucket Status
The status of a budget bucket can be useful for understanding the current state of the bucket and its contents. The following
status indicators are currently available for budget buckets:
- Draft: Bucket items are still under scrutiny and not yet approved.
- Long Term: This status can be useful for marking buckets as back-logs.
- Set and Ready: This status indicates that the bucket items are ready to commence works.
- Underway: This status indicates that the bucket items are currently in progress.
- On Hold: This status indicates that the bucket items are currently on hold for some reason.
- Work in Progress: This status indicates that the bucket is long term, and some works were completed in a prior period.
- Pending Finalisation: This status indicates that works are complete, but the bucket is pending capitalisation.
- Closed: This status indicates that the bucket is closed and no further works are to be completed.
Currently, the ‘Closed’ status is the only status that affects how the system treats the bucket. Any closed buckets can
not be edited or modified in any way. The system will also not allow the user to assign any new items or spend items
to a closed bucket.
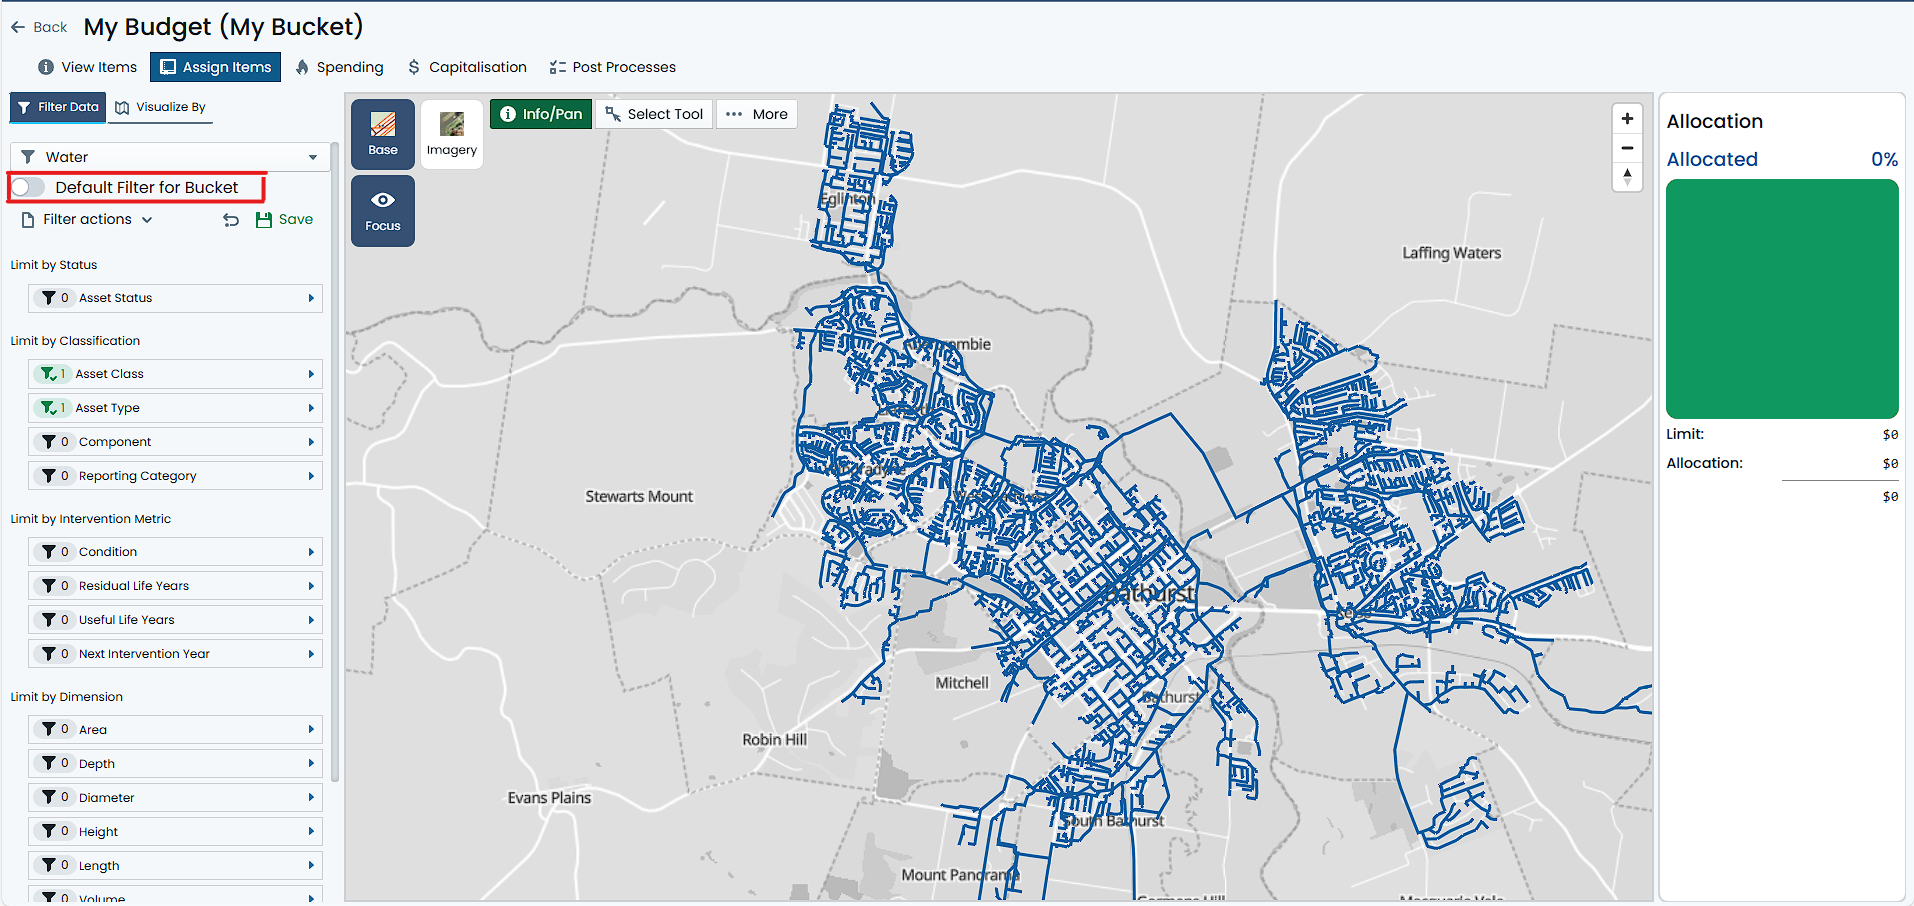
Bucket Default Filter
When working with an asset portfolio across many different asset/component types, it can become tedious to
constantly filter your available items to the specific type that the bucket is designed for. This is why
the concept of a default filter was introduced.
The default filter is a filter that is applied to the map when the bucket is opened. The filter does NOT control the items
that are assigned to the bucket, but rather, it controls the items that are displayed in the map when the bucket is opened.
Subsections of How To Guides
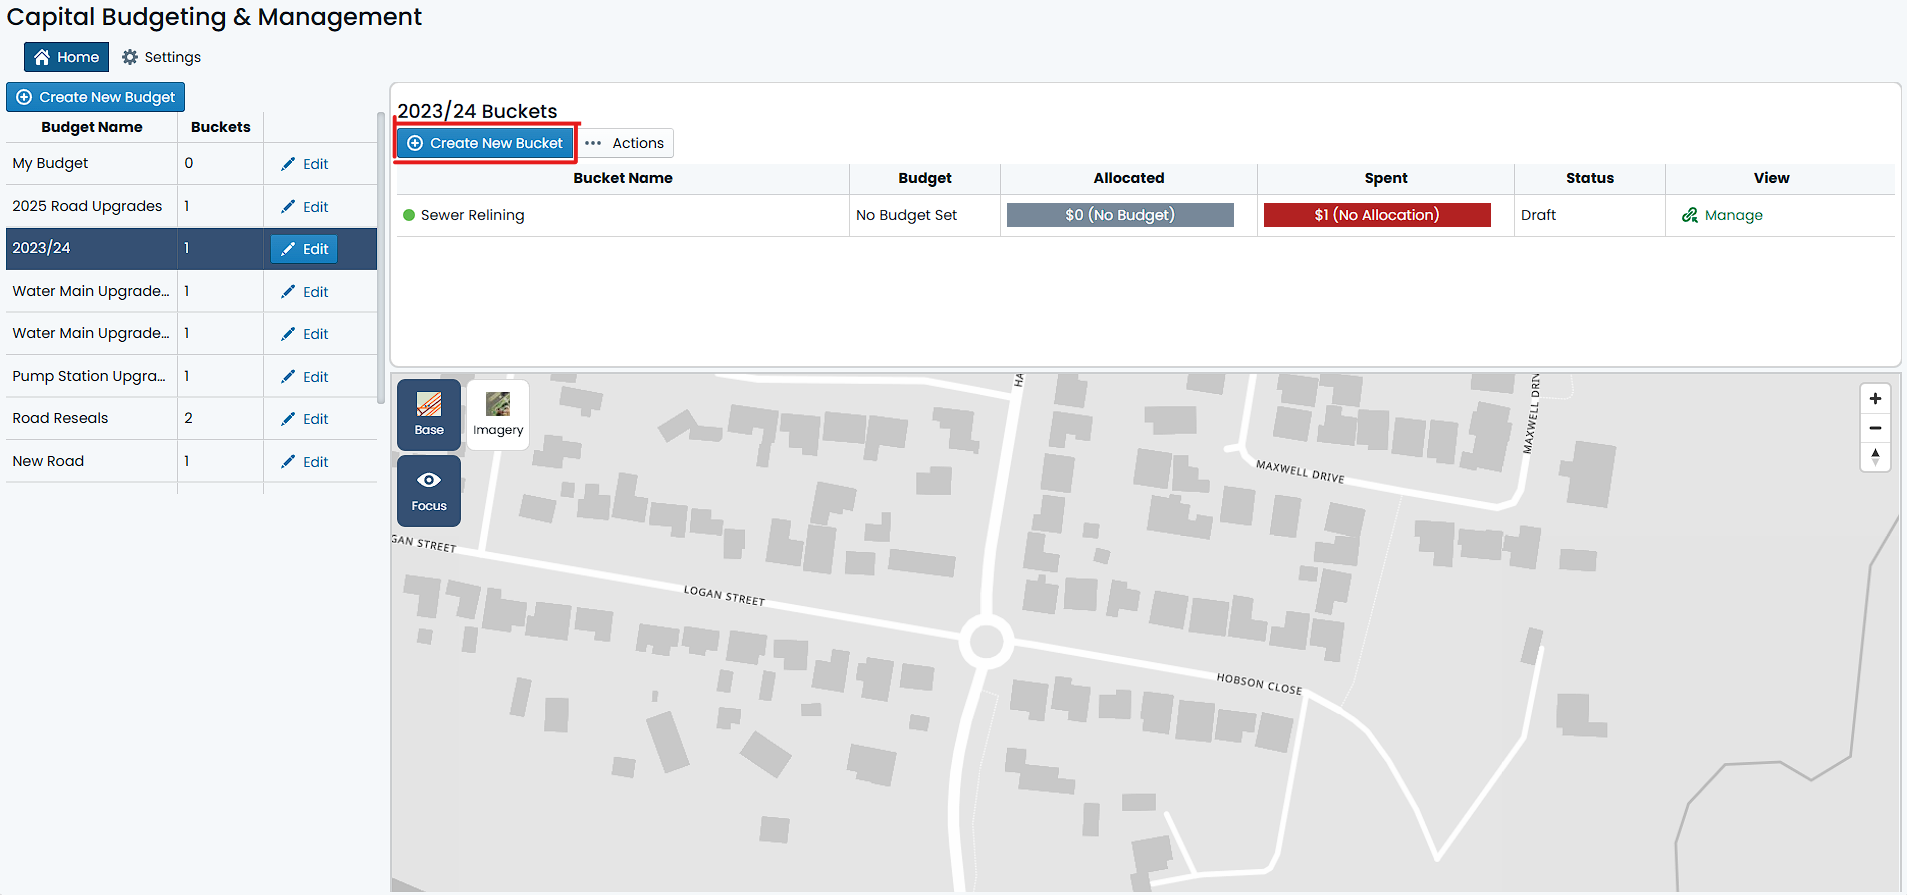
Create a Budget Bucket
In order to create a budget bucket, you must first navigate to the budget that will contain the bucket. Once you have
selected the target budget, simply click on the ‘Create New Bucket’ button located in the top-left corner of the budget
card. A dialog will appear prompting you to complete the following steps:
- Enter the Bucket Name. This field is mandatory.
- Enter a Limit for the bucket.
- Enter a Description for the bucket.
- Enter an External Ref for the bucket.
- Enter a Comment for the bucket.
- Enter Capitalisation Shares for the bucket. Capitalisation Shares (renewal/upgrade/new) must sum to 100%.
Once your have filled out the above fields, click ‘Save’ to create the bucket. The new bucket will now be visible
against the budget.
Info
Only the Bucket Name is a mandatory field. All other fields are optional and can be defined later in the process
if needed.
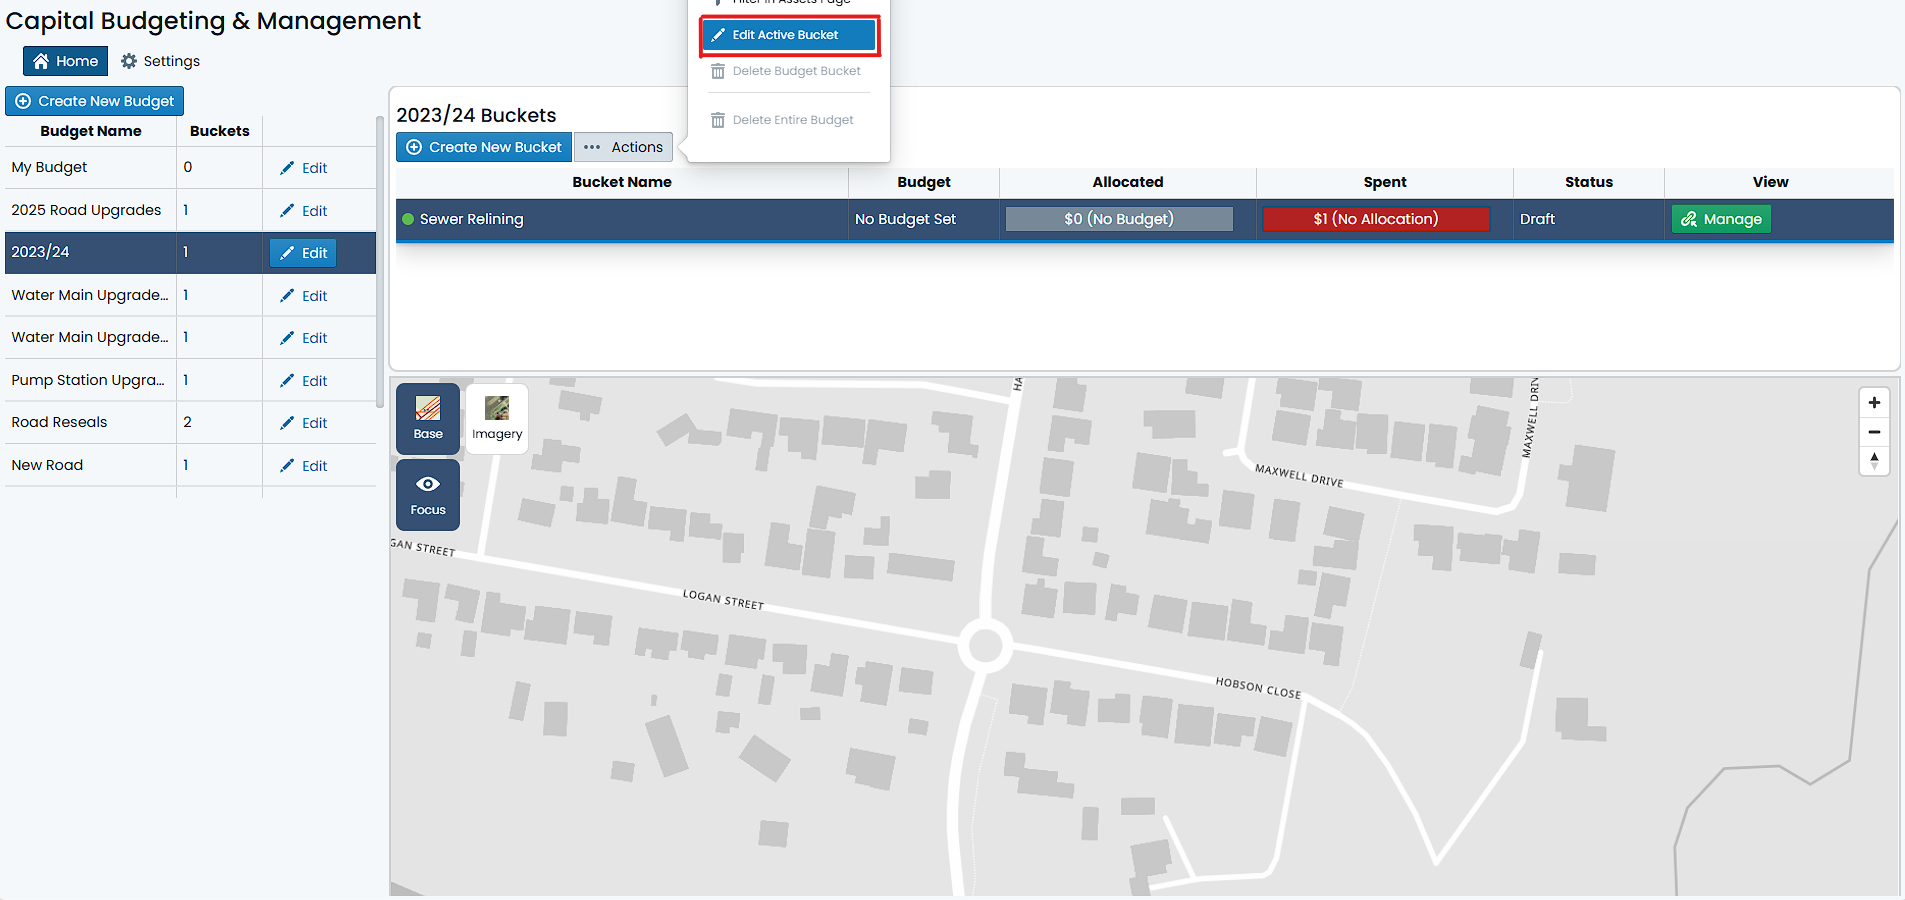
Edit details of a Budget Bucket
In order to edit an existing budget bucket, simply navigate to the ‘Capital’ section of the application and locate the budget
bucket you wish to modify. Once found, complete the following:
- Select the bucket you wish to modify.
- From the ‘Action’ menu (denoted with three dots) on the left-hand side of the budget card, click ‘Edit Active Bucket’.
- Modify the desired fields in the dialog that appears.
- Click ‘Save’ to apply the changes.
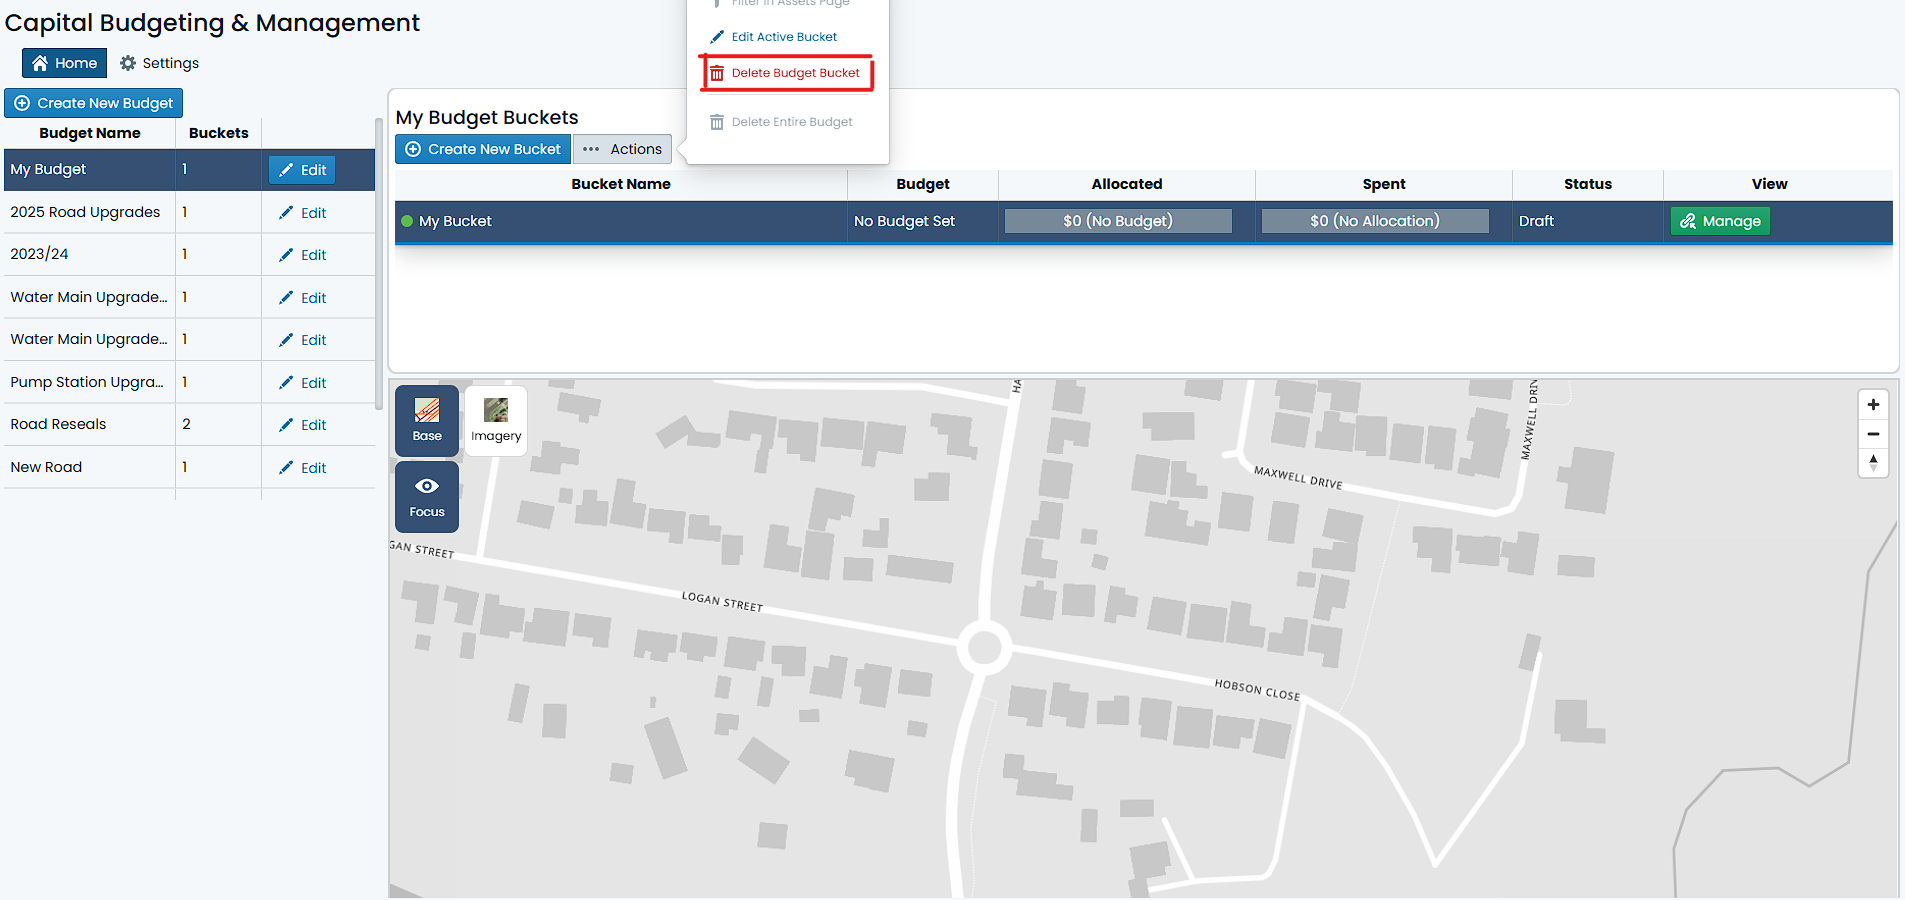
Delete a Budget Bucket
In order to delete a budget bucket, simply navigate to the ‘Capital’ section of the application and locate the budget bucket within
the parent budget. Once found, complete the following:
- Select the bucket you wish to delete.
- Choose ‘Delete Budget Bucket’ from the ‘Actions’ menu (denoted with three dots).
- confirmation dialog will appear, asking you to confirm the deletion of the bucket. Click ‘Delete’ to proceed with the deletion.
The budget will be removed from the list of budgets and will no longer be available in the system.
Info
If the budget bucket contains any assigned items (components), or has any spends logged against it, it will NOT be possible
to delete the bucket. All spends and assigned items must be removed first.
Bucket Default Filter
In order to set the default filter for a given Budget Bucket, navigate to the ‘Capital’ section of the application and
locate the budget bucket within the parent budget. Once found, complete the following:
- Select the budget you wish to rename.
- On the right hand side of the bucket row, click on the ‘Manage’ button.
- You will be navigated to the bucket’s default management page (view mode)
- As the default filter pertains to the visibility of assets & components when assigning items to the bucket, the screen
where you can set the default filter is located in the ‘Assign Items’ tab. At the top of the page, click on the ‘Assign Items’ tab.
- You will then be taken to the ‘Assign Items’ page. On the left-hand side of the page, you will see the standard Metrix
filter panel. At the top of this filter, you will see the standard Filter selection box.
- From the Filter selection box, select the filter you wish to set as the default filter for this bucket.
Info
If no saved filters exist, you will need to save one first.
- Once you have selected the filter, toggle the ‘Set as Default’ switch to set the active filter as the default filter
for the bucket.
Warning
Only SHARED filters are available for selection as a default filter.