How To Guides
This section covers some How-To instructions for working with budget buckets in the Metrix Asset Management system. Included in this section are the following topics:
This section covers some How-To instructions for working with budget buckets in the Metrix Asset Management system. Included in this section are the following topics:
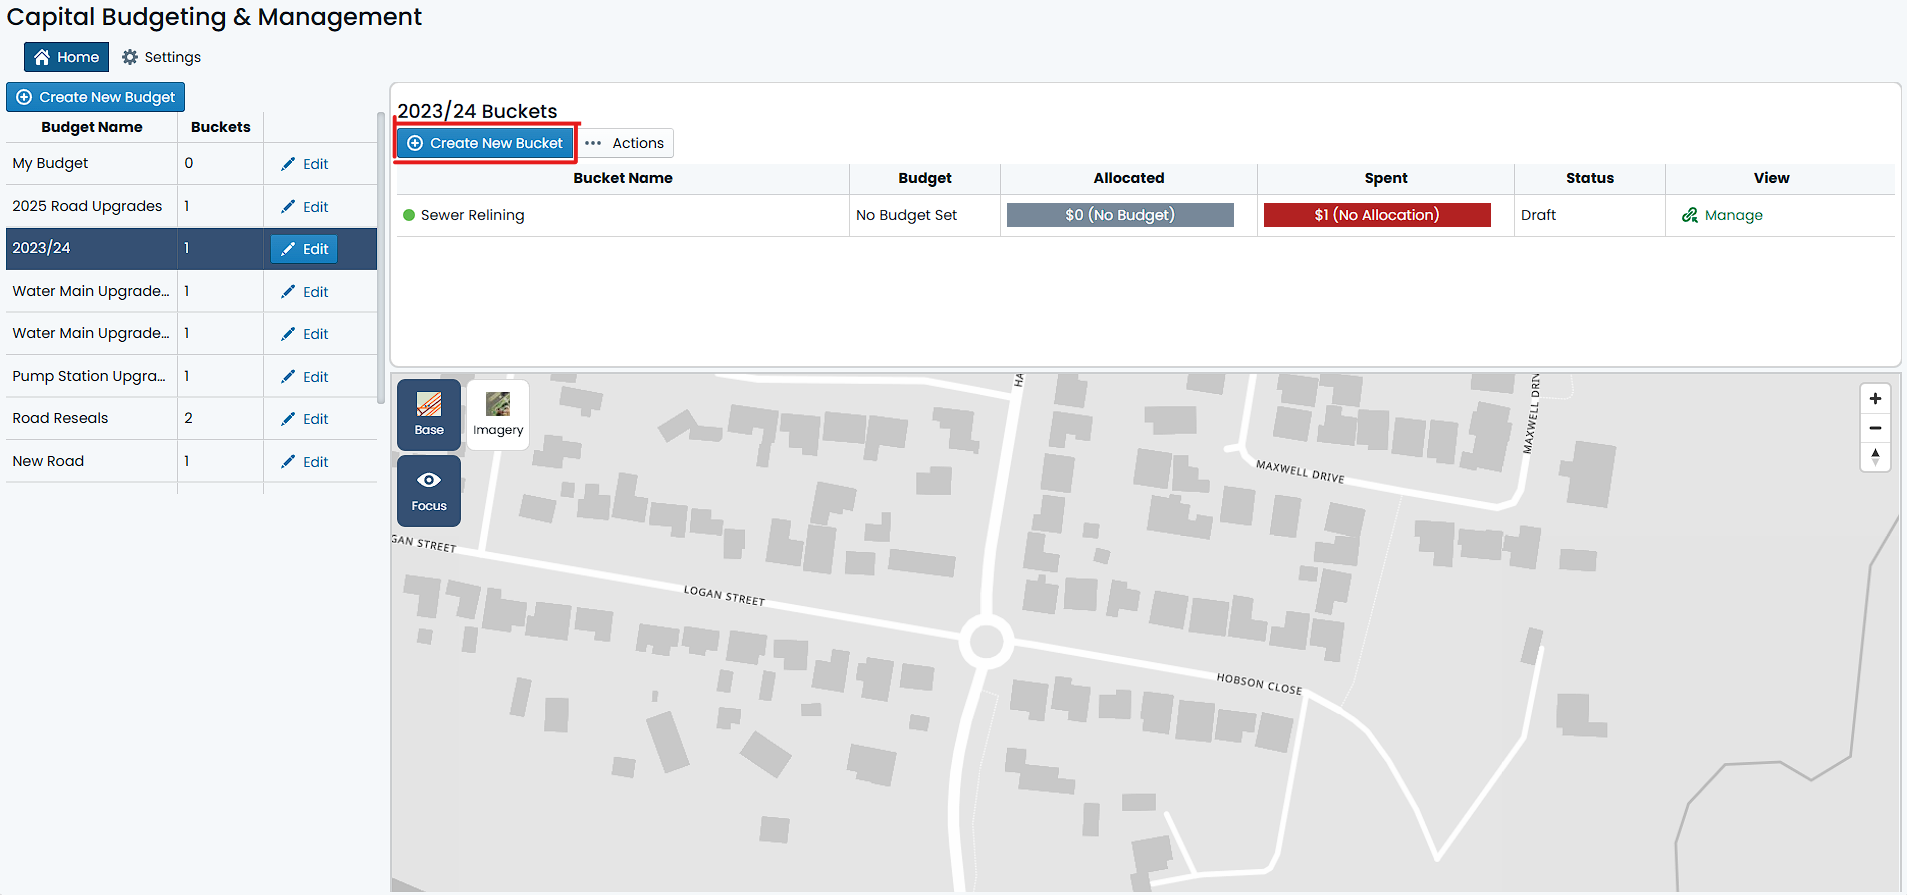
In order to create a budget bucket, you must first navigate to the budget that will contain the bucket. Once you have selected the target budget, simply click on the ‘Create New Bucket’ button located in the top-left corner of the budget card. A dialog will appear prompting you to complete the following steps:
Once your have filled out the above fields, click ‘Save’ to create the bucket. The new bucket will now be visible against the budget.
Only the Bucket Name is a mandatory field. All other fields are optional and can be defined later in the process if needed.
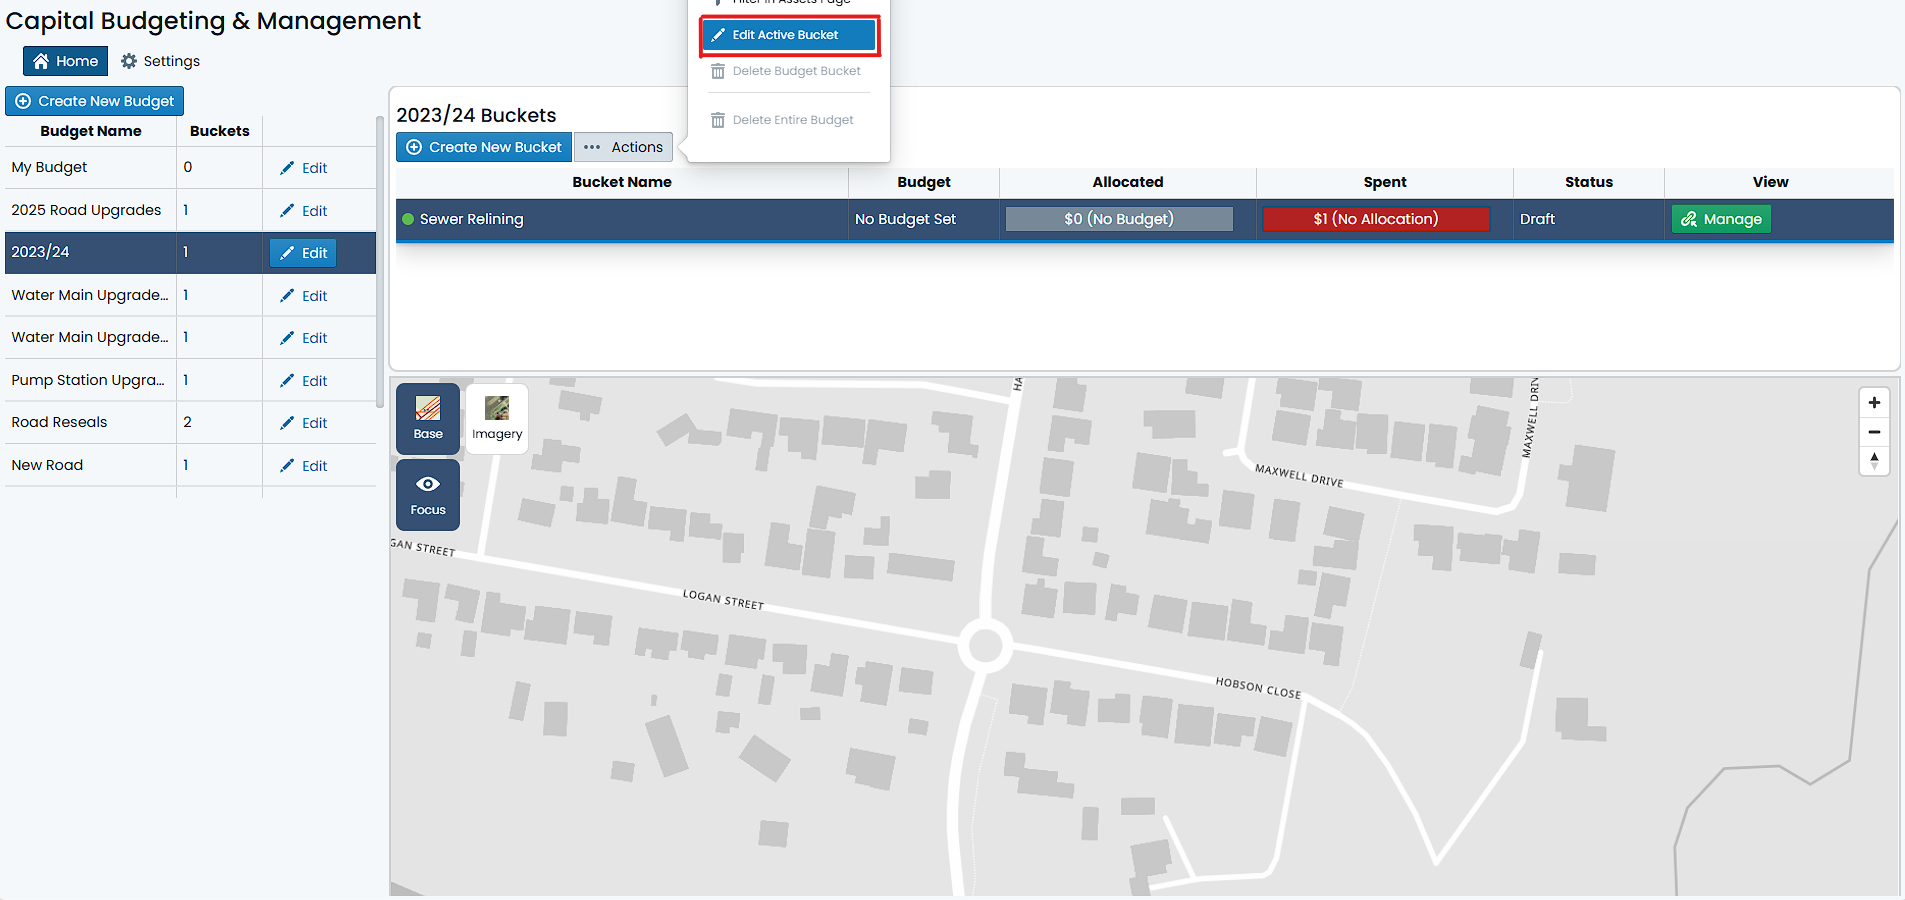
In order to edit an existing budget bucket, simply navigate to the ‘Capital’ section of the application and locate the budget bucket you wish to modify. Once found, complete the following:
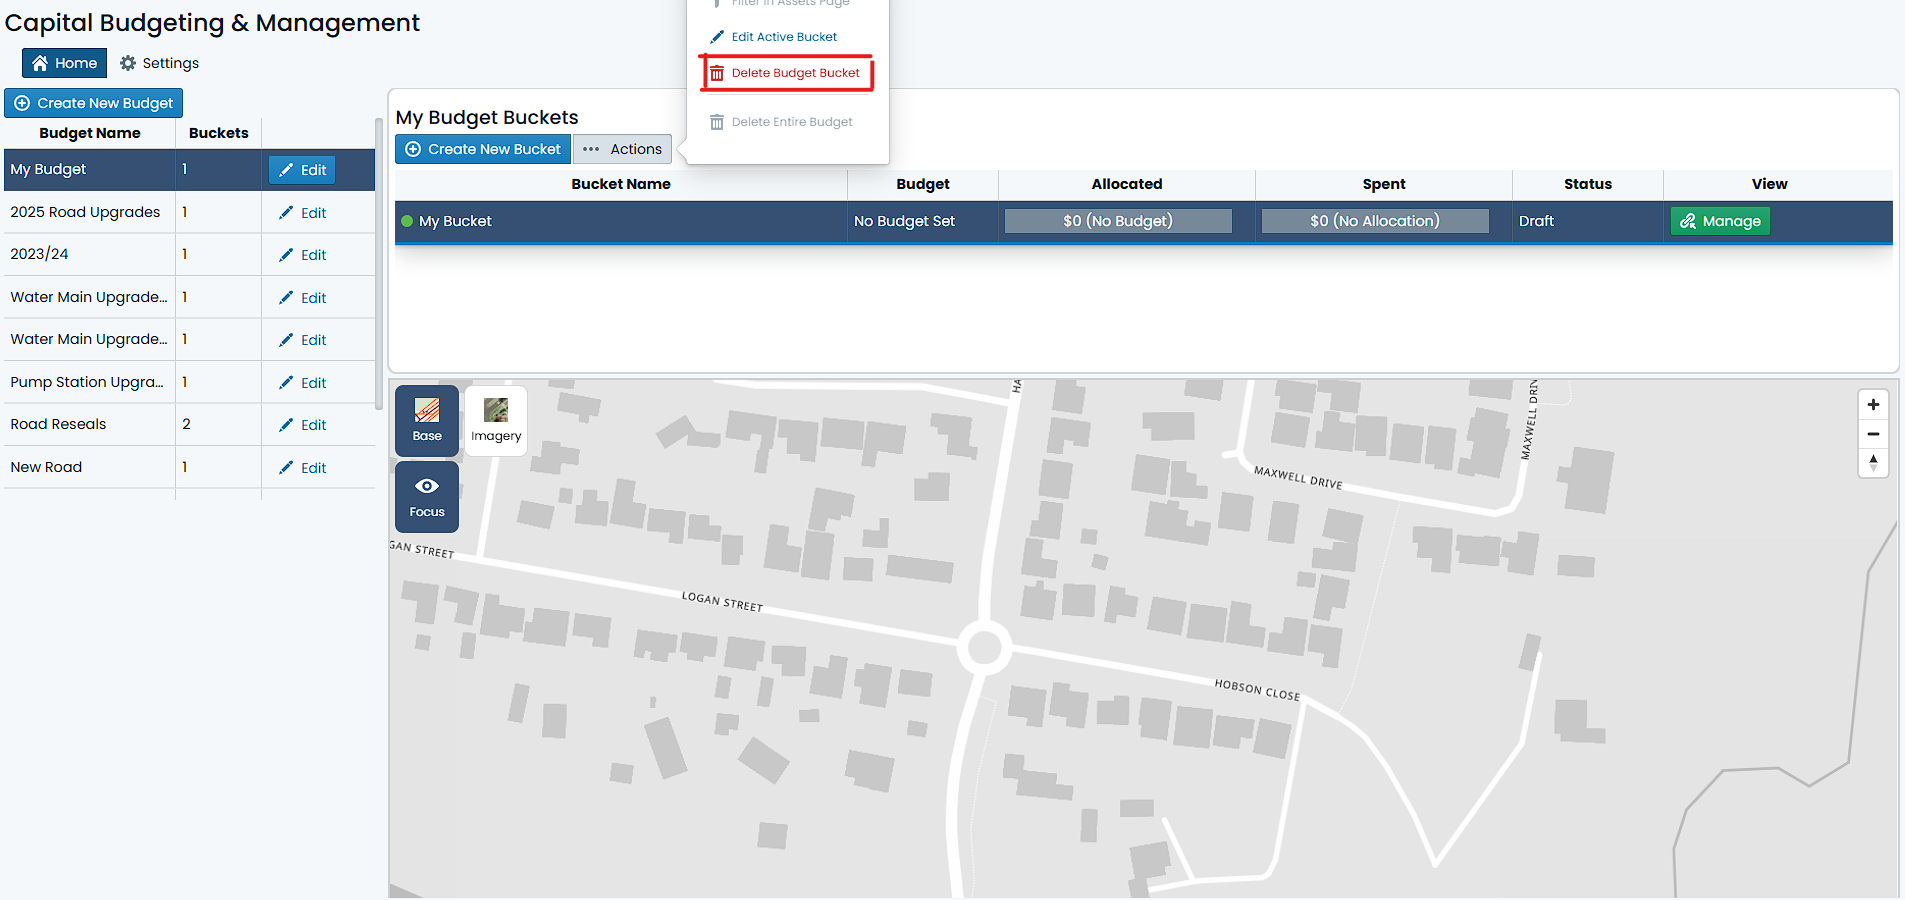
In order to delete a budget bucket, simply navigate to the ‘Capital’ section of the application and locate the budget bucket within the parent budget. Once found, complete the following:
The budget will be removed from the list of budgets and will no longer be available in the system.
If the budget bucket contains any assigned items (components), or has any spends logged against it, it will NOT be possible to delete the bucket. All spends and assigned items must be removed first.
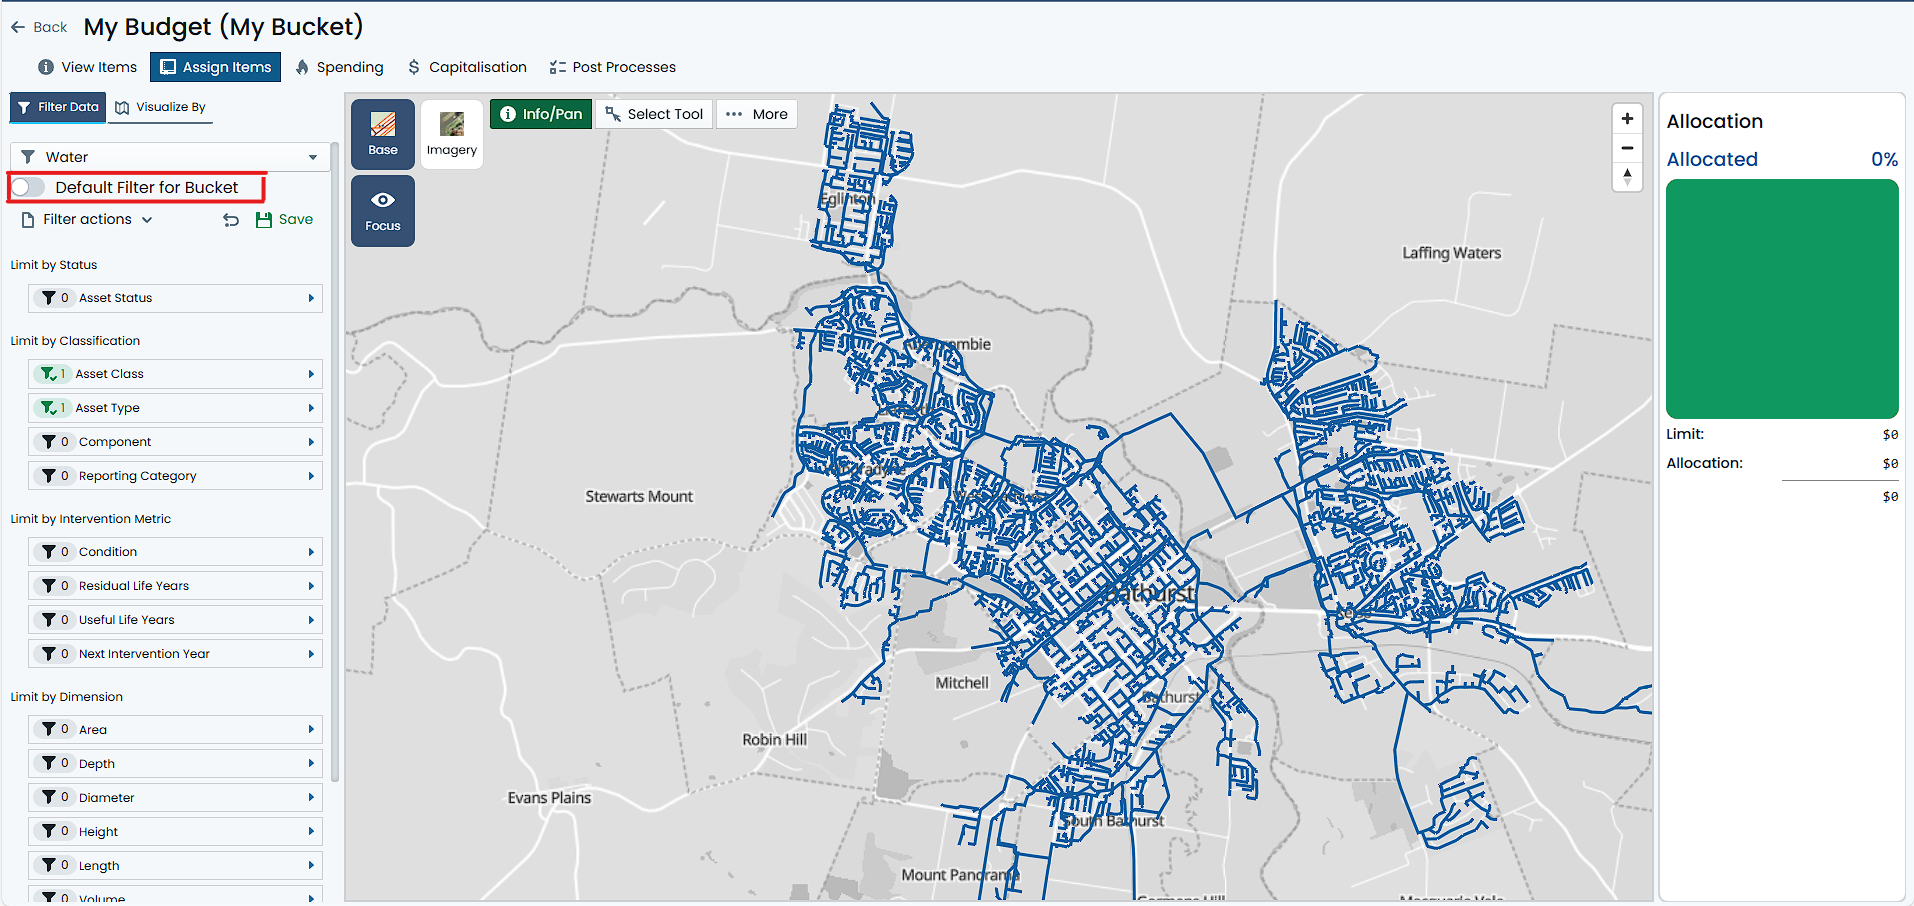
In order to set the default filter for a given Budget Bucket, navigate to the ‘Capital’ section of the application and locate the budget bucket within the parent budget. Once found, complete the following:
If no saved filters exist, you will need to save one first.
Only SHARED filters are available for selection as a default filter.