About
This section provides background context to a number of concepts and requirements of the Data Import process. Including:
This section provides background context to a number of concepts and requirements of the Data Import process. Including:
For data imports, the required file type for data is CSV - that is, comma separated value files that can be generated from Microsoft Excel or Google Sheets. See Creating CSV Files for details on this. There are also a number of other restrictions and requirements for data imported via these CSV channels. These include;
Within your CSV file, any date values must be formatted as DD/MM/YYYY. For example; 24/10/2023 represents the 24th of October, 2023. It should be noted that the time of day will always be set to 00:00AM for imported data.
The supported spatial format is ‘WKT’ (Well Known Text). This is a text string that represents a valid geometry definition. See Create WKT Geometries using QGIS for more details on this.
The maximum support CSV file size is 20MB. If your CSV file exceeds this limit, consider splitting it into two or more smaller CSV files.
The header row of the csv file must be restricted to row 1 of the file. Also, the header row must not contain any spaces or special characters (such as carriage returns, or line feeds). The header row is mandatory.
Throughout the CSV file, if any data row cells are blank, they will be ignored by the importer. This means that, when updating existing data, setting a CSV cell to blank will NOT delete the corresponding data from the system.
Where supported, users can include the effective_date column to stipulate when the new record, or updated data, should be
considered effective from. This can be useful in setting a residual life value as at a particular point in time.
When constructing your CSV file, avoid special characters in both your header row and data rows. These include, but are not limited to:
When using a product such as Microsoft Excel or Google Sheets, the program will allow you to utilise cell formulas whilst working on your data. As soon as you save and close the file however, the formulas will disappear, and only the results will be saved.
This page provides guidance on how to create a CSV file from within Microsoft Excel and Google Sheets on a Windows based machine. As these are 3rd party programs, screenshots and processes are subject to change without notice. However, is is anticipated that the basic flow should remain the same.
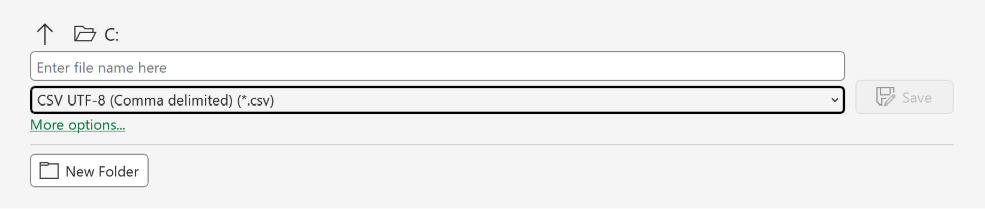
To create a CSV file from your data in Microsoft Excel, you will need to ‘Save-As’ the data with the ‘CSV’ file extension enabled. To do this:
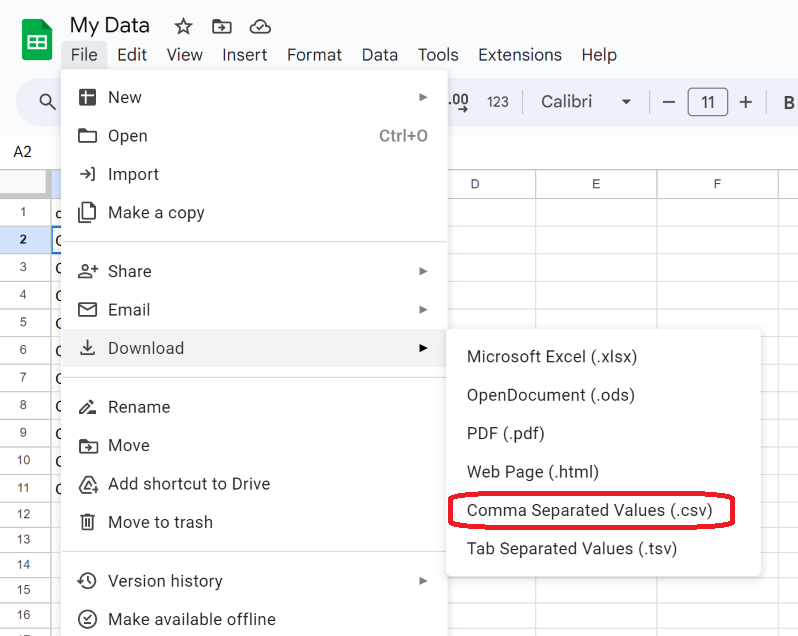
To create a CSV file from your data in Google Sheets, you will need to ‘Download’ the data with the ‘CSV’ file type set. To do this:
CSV files do not support multiple worksheets. If your workbook contains multiple worksheets, the CSV export will be created from the currently active worksheet only.
When you are importing assets with more than one (1) component - such as a road asset with earthworks, base, and surface - you
will need to have a csv row for each of the components being imported. To tie the rows together, so the system knows they are
of the same asset, rather than distinct asset entries, set an identical asset_import_ref for each row.
Below is a video that demonstrates this practice.
QGIS, an open source and free Spatial Data creation & editing tool, has the ability to export data in CSV format. Within these files, the geometry data can be represented as WKT (Well Known Text). This is the supported spatial type for importing data into the Metrix Asset Management system using CSV files. To do this, follow the steps below:
You now have a valid CSV file with a WKT Geometry Column, as well as any other data attributes that were in the spatial file from QGIS. Below is a video guide of the above steps.