Un-Assign a Budget Item
To unassign a Component Item from a Budget Bucket, you must have navigated to the desired Budget Bucket, and have selected the parent Asset of the Component you want to unassign. See Selecting Items for detailed instructions on doing this.
This how-to guide pertains to unassigning a single Component from a Budget Bucket. For help on unassigning multiple Component Items in bulk, see Bulk Unassign Budget Items.
To unassign a Component Item from a Budget Bucket, follow these steps:
-
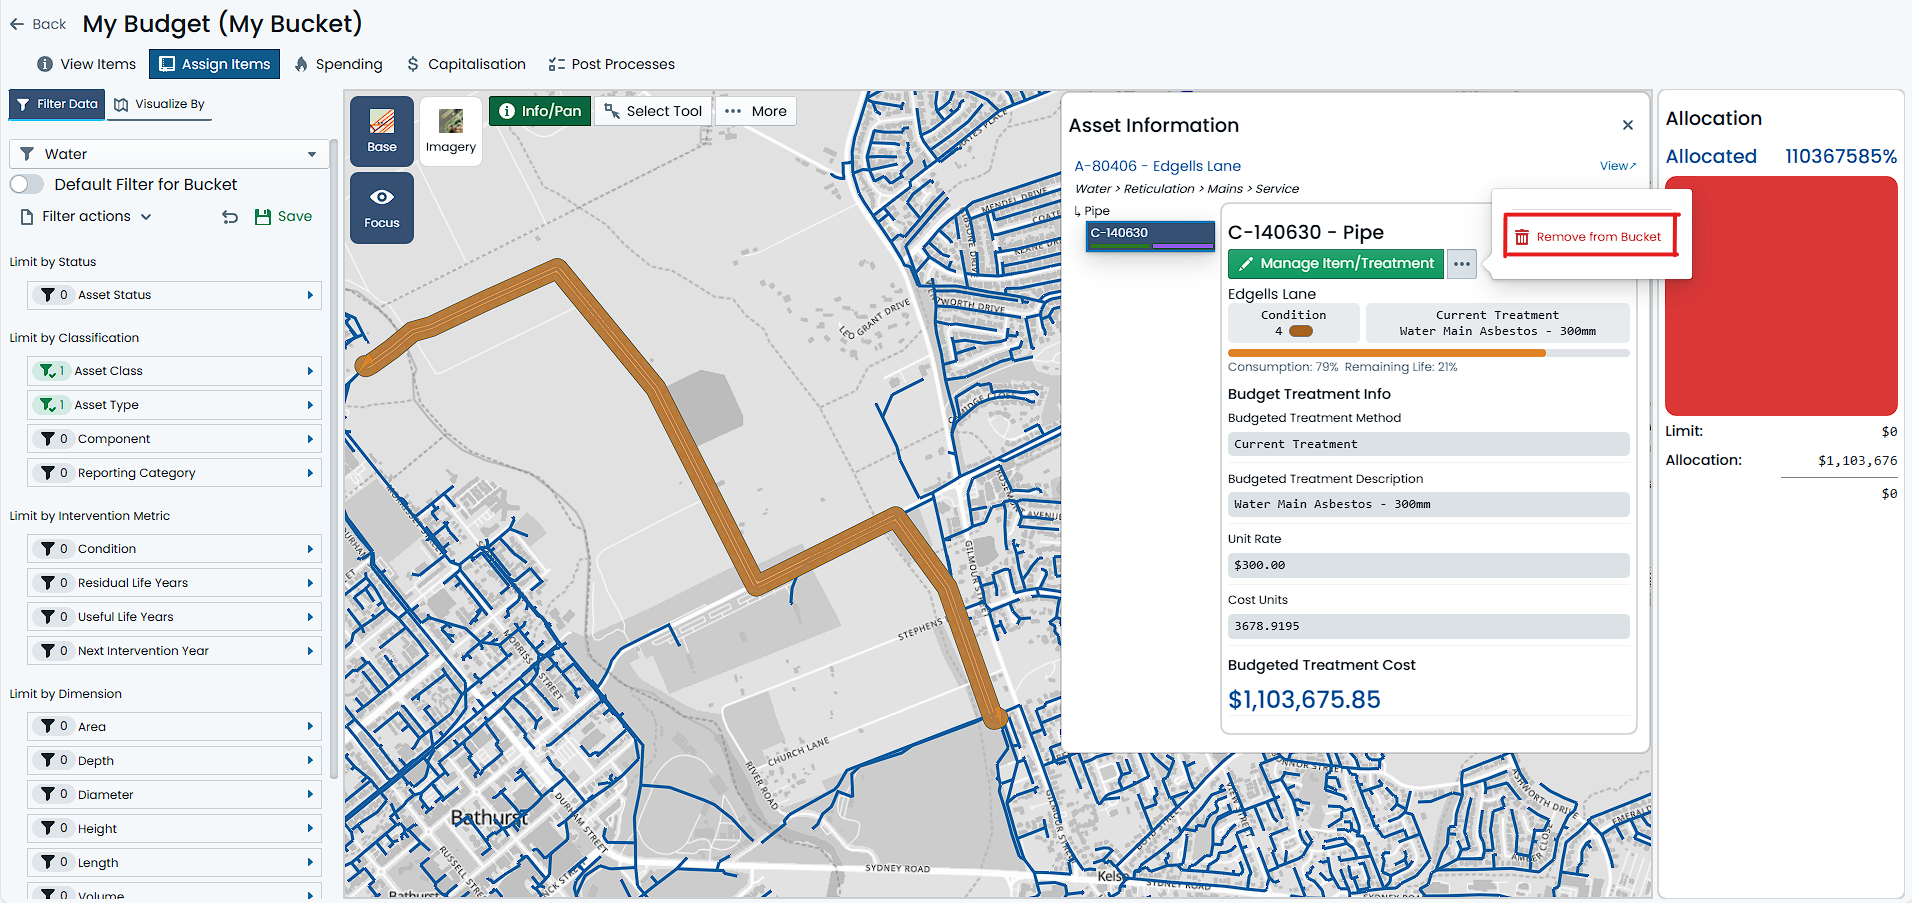
Select a single Asset from the map using the above-mentioned methods. You will know that you have a single selected Asset when the Asset is highlighted in blue on the map, and the Asset’s details are displayed in the right-hand Info Panel.
-
For items already assigned to the Budget Bucket, the Info Panel will show a ‘Manage Item/Treatment’ button at the top. Next to this button will be an actions menu (denoted by three dots) with additional options. Click on the ‘Actions’ menu.
-
From the actions menu, select ‘Remove from Bucket’.
-
A confirmation window will appear. Click ‘Delete’. This will unassign the selected Component from the Budget Bucket.
The Component Item has now been removed from the Budget Bucket. If the budgeted treatment method for the Item resulted in a cost, the Bucket’s Allocation gauge will react accordingly.
There are circumstances where the ‘Remove from Bucket’ option will not be available. This is usually due to the Item having capital spends linked to it. In this case, you will need to remove any and all of these affected capital spend before you can unassign the Item from the Bucket.