How To Guides
This section provides how to guides around setting Component Ageing Events within the Metrix Asset Management system.
This section provides how to guides around setting Component Ageing Events within the Metrix Asset Management system.
This section covers the necessary steps involved in managing Component Ageing Events within the Metrix Asset Management System.
Changing the Ageing Period(s) WILL have an effect on the reported Residual Life values for every Component in the system.
This is because a Component will NOT start ageing until it reaches it’s first ageing period. Additionally, the most recent ageing period is the last time that any Component could have aged. Moving these start/end points, has a direct impact on the amount of ageing that can occur for each and every Component in the system.
Proceed with Caution!
To manage ageing events within the Metrix Asset Management system, navigate to the System Admin menu from the profile menu, and then follow the steps below:
Select the ‘Home’ section from the left-hand side navigation pane within the System Admin page.
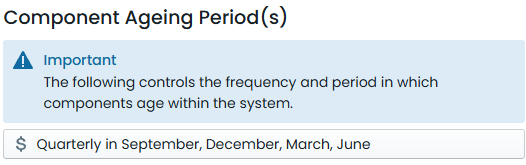
On this page, there is a section title ‘Component Ageing Period(s)’. In it, a button is titled with a brief description of the
current ageing event configurations. Click this button to view the detailed ageing event configurations.
A dialogue window will then appear, showing the months within a fiscal year, and indicating which months are currently selected
as ageing periods. Months that are coloured green are selected.
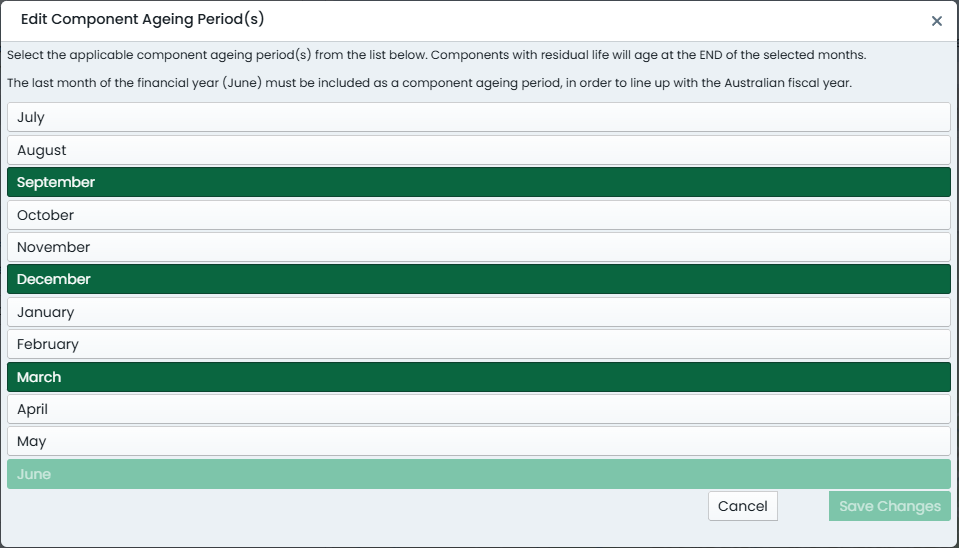
To add/remove months from the selected list, simply click the corresponding button.
Once you have made the necessary changes, click ‘Save Changes’ to apply the changes.
A confirmation window will appear, requiring you to confirm the changes. If you are sure you wish to proceed, tick the checkbox to confirm, and then click ‘Confirm Changes’ to finalise the changes.