How To Guides
This section contains how to guides with respect to intervention treatment definitions in the Metrix Asset Management system.
This section contains how to guides with respect to intervention treatment definitions in the Metrix Asset Management system.
This section covers the necessary steps involved in creating a new intervention treatment within the Metrix Asset Management System. This extends to the initial creation of the treatment with basic field values. In subsequent sections, details such as attachments, bulk creation, and history will also be detailed.
As with most resources within Metrix, simply creating an intervention treatment does NOT make it available for use. You still need to assign the intervention treatment to the Classification(s) that should use it.
To create a new intervention treatment within Metrix, complete the following steps:
Navigate to the ‘Treatments’ management page (Assets Menu > Treatments).
Click on ‘Create New Treatment’ at the top of the page.
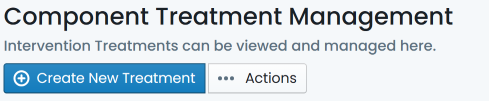
This will create and display a default treatment definition on the right-hand side of the page.
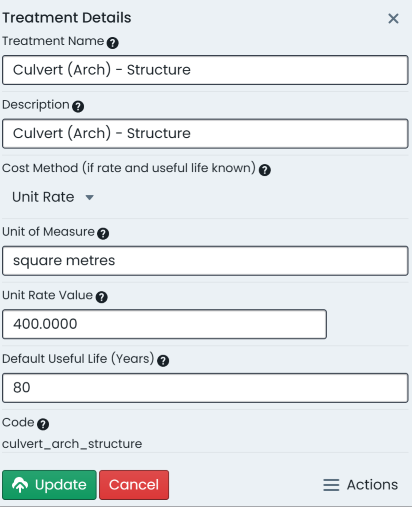
From here, you will first need to set the ‘Treatment Name’ and provide a short ‘Description’ for the new intervention treatment. Simply type these values into the corresponding form fields.
Next, you will need to choose the ‘Cost Method’ of the intervention treatment. See (see Background for more information on choosing an appropriate method.
With the ‘Cost Method’ chosen, the interface will react by asking for follow up information related to this method. Firstly, you will need to set the ‘Unit of Measure’ for the intervention treatment. This is a free text field and is typically populated with values such as ‘metres’, ‘square metres’, and the like.
Next, set the ‘Unit Rate’ value – this is the dollar value unit rate for the treatment.
Lastly, set the optional ‘Default Useful Life’ field. This value, if set, will provide a suggested useful life to users applying this treatment to components.
Once all fields are completed as desired, click ‘Create’. The treatment has now been created.
Given the breadth of scope surrounding intervention treatments, it can become overwhelming to consider keying each definition into the system manually. For this reason, the Metrix Asset Management System supports importing bulk treatment definitions through simply pasting compatible Excel/CSV data rows. The following instructions guide you through using this bulk import process.
Navigate to the Treatments management page (Assets Menu > Treatments).
Next to the ‘Create New Treatment’ button, click on the ‘Actions’ menu.
From the drop-down options, select ‘Import Treatments from CSV’.
A dialog will appear with an input for pasting Excel/CSV data, and some basic instructions on use. Before proceeding, consider the following notes on data formatting.
a. The pasted data should NOT contain the header row.
b. The pasted data should contain the following fields (in this specific order):
- Treatment
- Description
- Cost Method ID (see below for details)
- Unit Rate
- Unit of Measure
- Default Useful Life
c. With regards to the Cost Method ID, the accepted values are:
- For Unit Rate, use $ unit\_rate $
- For Network Rates, use $ network\_assets $
- For Fixed Rate, use $ fixed\_value $.
Paste your formatted data into the text box.
A preview of your pasted data will appear in a table view below the text box. Any errors will be highlighted in this preview.

To confirm the creation of the previewed treatments, click ‘Save’ below the preview table. Alternatively, click ‘Clear’ to cancel.
The imported treatments will now be created.
As conditions over time adjust, it becomes necessary to maintain your treatment definitions to reflect the new normal. Typically, this means updating unit rates, and/or default useful lives. To edit an existing intervention treatment, follow these steps:
Navigate to the desired Intervention Treatment (Assets Menu > Treatments > Selected Treatment).
With the desired treatment selected, an editable preview of the definition will appear on the right-hand side of the page.
Enter the required alterations to the selected treatment.
Once complete, simply click ‘Update’ to commit the changes.
Given the amount of detail that goes into calculating treatment unit rates and default life values, there is often a large amount of supporting documentation around the intervention treatments inside the Metrix Asset Management System. To assist with managing this information, the system makes it easy to upload these documents against the treatment definition directly. To do so, follow these steps:
Navigate to the desired Intervention Treatment (Assets Menu > Treatments > Selected Treatment).
With the treatment selected, a preview of the treatment definition will appear on the right-hand side of the page.
At the bottom of this preview, is an ‘Actions’ menu that provides additional management options for the selected treatment. Click on the ‘Actions’ menu.
From the drop-down menu, choose ‘Manage/View Attachments’.
The standard Metrix attachments interface will then display in a new dialog box. Any existing attachments will be displayed, as well as an option to upload additional documents.
To create a new attachment against the selected treatment, you can do one of the following:
a. Drag and drop the file into the ‘drop space’ denoted by a dashed line. The attachment will immediately upload and be linked to the treatment.
b. Choose the file from your file system using the file picker. To do this, click ‘Select File for Upload’ and then choose the desired file from the file picker. The attachment will immediately upload and be linked to the treatment.
c. Choose from an existing attachment that is already linked to another Intervention Treatment. To do this, click ‘Link to an Existing Upload’ and choose the attachment from the subsequent list. This will mean that you do not have multiple copies of the same attachment but can still access it from many treatments.
Once finished, simply close the dialog box.
At any time in the Metrix Asset Management System, you can see the status of a treatment at any time in its history. To do so, follow these steps:
Navigate to the desired Intervention Treatment (Assets Menu > Treatments > Selected Treatment).
With the desired treatment selected, an editable preview of the definition will appear on the right-hand side of the page.
At the bottom of this preview, is an ‘Actions’ menu that provides additional management options for the selected treatment. Click on the ‘Actions’ menu.
From the drop-down menu, choose ‘Show Treatment History’.
A dialog box will appear, showing the earliest record of the current intervention treatment.
At the bottom of this preview are two arrows for navigating through historic versions of the treatment.
Just above these arrows, is an ‘Updated on’ field detailing when the change occurred.
Once a treatment definition has been constructed, you can assign it to a specific classification (or a set of classifications) in order to use that treatment in production as either a component current treatment, or next treatment.
To begin assigning treatment to a classification or set of classifications, navigate to that treatment within the Intervention Treatment page (Assets Menu > Treatments> Selected Treatment).
With the desired treatment selected, an editable preview of the definition will appear on the right-hand side of the page.
At the bottom of this preview, is an ‘Actions’ menu that provides additional management options for the selected treatment. Click on the ‘Actions’ menu.
From the ‘Actions’ menu, choose ‘Manage Classification Links’.
A dialog box will appear with lists of available links that could be
made. It should be noted that only Component Classification links
are valid for Intervention Treatments.
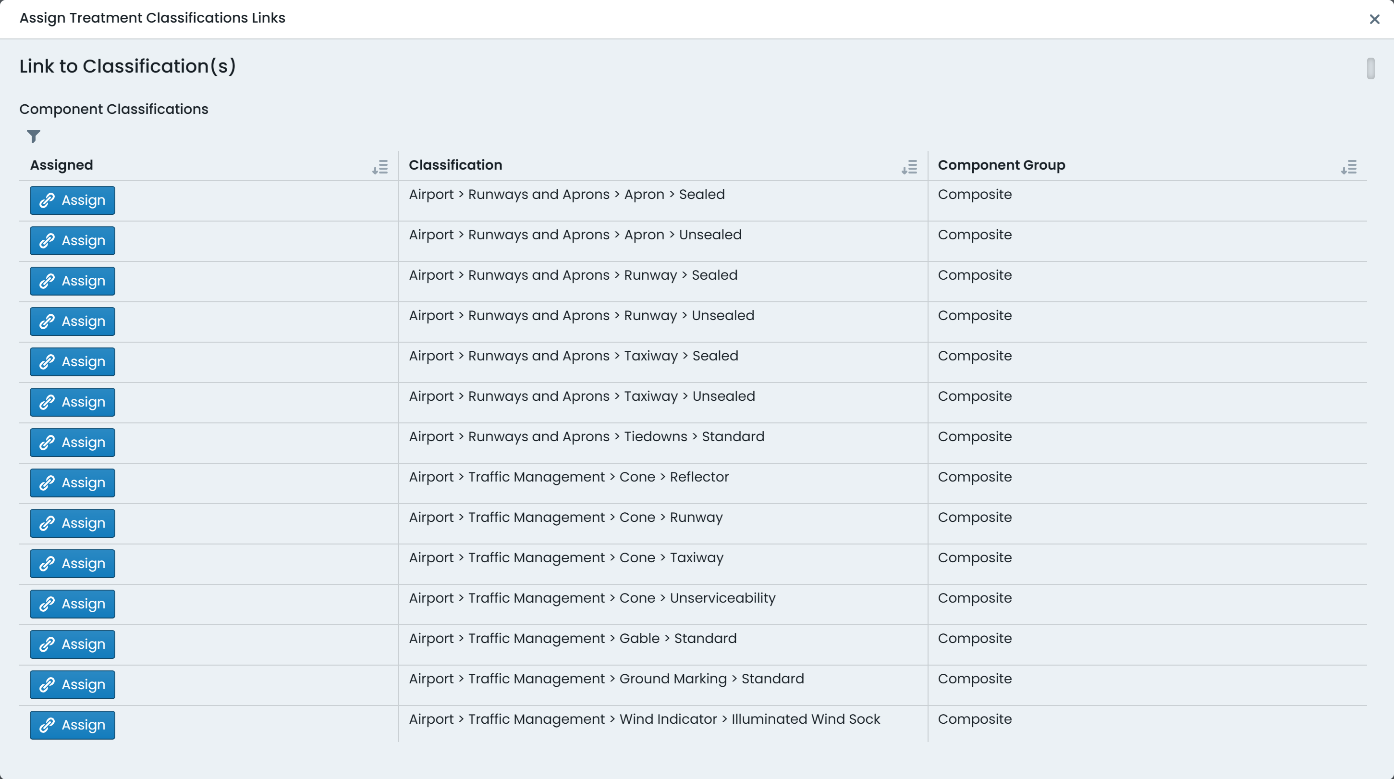
To assign a treatment to a classification, simply click ‘Assign’ next to that classification title.
To unassign a treatment from a classification, simply click ‘Unassign’ next to that classification title.
The system will manage the availability of the above buttons based on the form state in the system.
When there are a great number of Classification configurations to wade through, it can become difficult to find the one you are after. This is where the filter option comes in handy. To filter the classification list, simply click on the ‘Filter’ icon at the top of the classification list – the icon looks a little like a funnel.
To filter by a specific letter or set of letters, simply type them into the text input that will appear above the classification list.
To filter by classifications that already have the treatment assigned, mark the checkbox titled ‘Show Assigned Only’.
When a treatment is no longer required, the Metrix Asset Management system provides functionality for administrators to permanently remove it from the system.
Deleting treatment definitions cannot be undone. The following restrictions also apply when it comes to deleting treatments:
To delete a treatment definition, follow these steps:
To begin deleting an intervention treatment, navigate to that treatment (Assets Menu > Treatments > Selected Treatment).
On the bottom right-hand side of the treatment preview, there is an ‘Actions’ button – this type of button is implemented system wide as an indicator of additional options to manage a resource.
From the ‘Actions’ menu, choose ‘Delete Treatment’. If the button is not enabled, this means that the treatment cannot be deleted (see warning notes, above).
In the subsequent dialog, confirm your decision by clicking ‘Delete’.
The treatment will now be permanently deleted from the system.